What you did to your Tenere today??!!

TenereGUY

Well-Known Member
Joined
Jan 19, 2023
Messages
1,011
Location
Illinois
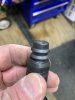
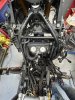
While getting ready for the Georgia trip today I put my tank bag on and 10 minutes later I took it off.I noticed that a quarter size spot on the tank had been imprinted by the bottom of the bag! Yikes, this paint hasn't hardened all the way yet! Was in the house for 3 weeks then put in a cold garage.
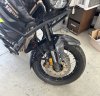
I rode up to Rockford and went to Auto Envy and told them the situation and that I was leaving on a trip tomorrow. Would he be able to put clear wrap on it today? He said to roll it in. About an hr later it was all done. Now my magnetic tank bag won't imprint or scratch my tank in the future. Makes it even more shiny too. If it gets swirls in it he said to park it in the sun for a while and it will heal and be shiny again with no swirls. Then on his own he ceramic coated my windshield as he said bugs will come right off and water won't stick... Hey could you do that to my helmet visor too? Sure, I can. So he did. He asked me to text him what I thought of it if I go through some rain.
I videoed the process and will upload video to YouTube later.
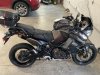
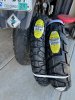
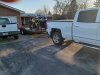
Now it's on the trailer next to Wymbly1971's bike ready for departure tomorrow.
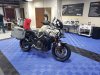
20240315_142036.jpg
20240315_181547.jpg
 

Tenforeplay

Active Member
Joined
Apr 29, 2023
Messages
259
Location
Kansas, USA
Installed the Fenda Extenda Extra! Had to order from the UK, no one in the US had one that I knew of.

The smallish oem fender didn't appeal to me, especially the first time I went through some mud and the front of the engine looked like ass. I didn't think the regular fenda extenda would do what I wanted, and someone here said there was an extra long version, so away I went.

It fit up really well, and I was pleased with that (Allen Millyard). I took the fender off to fit it. It comes with plastic push rivets for the attachment, and to drill for the holes you either need a 90 degree drill or something to provide the clearance to get between the fender and the engine/crash bar pieces. I thought it would be easier to just take the fender off, and it is. I ended up using aluminum 1/8" reach rivets instead of the plastic pieces, then used a black magic marker and hid em. It comes with some rubber pieces that go between the extender and fender, and I couldn't figure out why. I think it is to keep water on the underneath from running back down the back side on the outside of the extender, I used some silicone sealer.

On fit up, the rear of the fender was too close to the tire for my liking so I drilled some more holes and put the fender in a more natural position and gave more clearance. I also used my stainless fasteners with locknuts. They provide black anodized threaded fastener and I didn't think that was too good an idea, re rust, but the washers and nut was stainless. I used 10-24 5/8" reach cap head screws because they worked and was what I had.

Think it turned out pretty well. See how long it lasts. It is pretty sturdy and glad I went with the aluminum rivets.

BED88A14-9F73-48E1-9430-22BE00E67B1F_1_201_a.jpeg921617A0-3770-4621-B463-52695576C542.jpeg
 

PhilCEE

Member
Joined
Dec 28, 2022
Messages
17
Location
Glastonbury
Fitted a Healtech Thunderbox TB-U02. Cable routing is an art I am still in the process of perfecting. Quadlock phone charger now works and I can just plug my Zumo XT2 straight in when it arrives.


Attachments

holligl

Find the road less traveled...
Joined
Nov 13, 2015
Messages
2,255
Location
IL/AZ
My OEM tank bag zipper failed, so I went with the Water Proof Nelson Rigg Huricane V2. A lot smaller but pretty functional and stable. Less obtrusive for off roading. I did reuse the fanny pack bag, attached the the handle.


Sent from my SM-S918U using Tapatalk
 

elricfate

Well-Known Member
Joined
Aug 29, 2019
Messages
381
Location
Ohio
I admit, I haven't checked the rear brake as often as I should. The front pads had about half their usable pad left, but the rear, I felt drag slightly. I pulled the bolts and popped the pads out. There's still some pad there. Some. Somewhere. A thin layer. But it's there.

Anyway, new EBC FA319/2HH pads in place. Next time I swap those will also probably be time to swap the rotor. It's still got a lot of usable thickness, but I know those 2HH pads tend to eat Yamaha rotors. I also went ahead and greased the shift pivot, changed the motor oil, changed the diff oil, and will finish up the brakes/clutch fluid swap this weekend. I also went ahead and swapped the front brake pads out with EBC FA380HH pads and put away the Yamaha branded OEM ones that still had half a pad left as backup emergency spares.

240402-PXL_20240402_142622126.jpg240402-PXL_20240402_142628197.jpg240402-PXL_20240402_142637757.jpg
 

Ossaboy2867

Active Member
Joined
Jan 24, 2017
Messages
103
Location
Wellsville NY
Started the dreadful process of removing everything...... I hate the manual cam chain adjuster, going to replace it with the 3rd gen factory variant. While I am in there might as well check the valves again. I replaced the cam chain and shoe the last time I was in there. bought 4 new coils too as one looked pretty shitty. They are not cheap. Over $600 for 4 new OEM.
IMG_1232.JPG
 

Ossaboy2867

Active Member
Joined
Jan 24, 2017
Messages
103
Location
Wellsville NY
View attachment 110596
Well gee.... I'm in the process of shimming valves, new cam chain and replacing my 3rd generation tensioner for a new Graves manual unit. What's not to like with the manual CCT? And your bike looks much cleaner than mine, What's up with that?


Well I dislike the manual tensioner because they are very hard to "tune" correctly. Too loose you get backfiring and throttle surge at low RPM. Too tight and you can and will ruin the head and eventually. First thing to go will be the intake cam journal next to the cam sprocket that will get egged shaped due to the tensioner being set too tight. This is so hard to set correctly. Most mechanics will not get this right and even your most seasoned shade tree mechanics won't get it right.

I have not heard of any 3rd gen tensioners failing, unless there are some people on here that have had that happen please speak up.

And for the clean bike, trust me it gets ridden pretty hard. I buy that Maxima SC-1 by the case and always hose the bike down with it. It makes cleaning this pig a dream. Looks brand new still after 10 years. Plus the custom skid plate I made years ago covers the whole engine. Also, remove that 8mm bolt holding the brake lines in your photo. It makes putting the cover back on a bit better so you have more clearance. I like to use Yamabond #4 to glue the gasket in place on the cover for an easier installation.
 
Last edited:

gv550

Well-Known Member
Joined
Sep 14, 2016
Messages
1,351
Location
Listowel, Ontario, Canada
I’ve never had a problem with any cam chain tensioner, but with 100,000kms on my gen 2 version and forum talk of them failing I decided to replace it with a new gen 3. I now have 170,000 on the gen 3 and decided to go with a Graves manual because my engine sounds quite ‘rattly’ compared to my recently acquired T12 with one third the kms. Replaced the cam chain too. Not sure how to adjust it yet, I have it loose enough that I can move the chain guide a bit by hand, I expect I will gradually tighten it until (hopefully) the rattle disappears.
The previous owner of my second bike proudly stated nothing has ever been done the engine, no valve check in 9 years and 100,000 kms and still original gen 2 tensioner…… and it runs great. I’m torn between just riding it or do a full service of valve check, update the tensioner, spark plugs, etc.
LonghaulPaul told me his first T12 never had a valve check in 200,000 miles but he did install a manual tensioner, just turned it in a bit at each oil change until it ran out of adjustment!
I have read of gen3 tensioner failing, someone on this forum entered the iron butt rally a few years ago with a new T12 and the engine grenaded due to the tensioner failing. Yamaha fixed it under warranty and he sold the bike.
 

Boris

Well-Known Member
Joined
Dec 21, 2013
Messages
2,098
Location
midlands. UK
Well I dislike the manual tensioner because they are very hard to "tune" correctly. Too loose you get backfiring and throttle surge at low RPM. Too tight and you can and will ruin the head and eventually. First thing to go will be the intake cam journal next to the cam sprocket that will get egged shaped due to the tensioner being set too tight. This is so hard to set correctly. Most mechanics will not get this right and even your most seasoned shade tree mechanics won't get it right.

I have not heard of any 3rd gen tensioners failing, unless there are some people on here that have had that happen please speak up.
I have a gen1 bike and upgraded to the Gen2 updated CCT 6 years and 40k mile ago. It’s still quiet on start up as well as when warm. I don’t give the CCT any thought since upgrading.
 

cyclemike4

Well-Known Member
Joined
Sep 18, 2016
Messages
827
Location
ky
I have a gen 2 timing chain tensioner in my 2012. the tensioner has around 80,000 miles on it and seems fine. I remember when all the bikes I was around came from the factory with manual timing chain tensioners. Never had any trouble adjusting them and they really didn't need it much. It was pretty easy to tell with them if it was loose or too tight. you would get a whirring sound of the chain rubbing the tensioner guides too hard if it was too tight and would get a chatter if it was too loose at idle.
 
Top