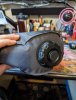
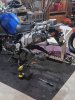
What's a colony???!! Those need to be coated!Down pipes (I think you may call them headers in the colonies?) off and harpic applied

Sent from my iPhone using Tapatalk

From your favorite rebel!
TG
What's a colony???!! Those need to be coated!Down pipes (I think you may call them headers in the colonies?) off and harpic applied
Sent from my iPhone using Tapatalk
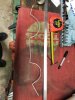

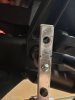
Yep, toilet cleaner. But get the one in the black container , Harpic power plusHarpic? You mean like the toilet cleaner? Am I missing something here?
Texas bugs are extra “juicy”Do y'all not have bugs? Or does it rain that often? I have to clean my visor at least bi-weekly or I can't hardly see.
There's one, and I don't know which one, that when you hit it, it leaves a nickel to quarter sized yellow splat. And if you don't clean it off quickly, and it dries, it's hard as hell to get off.Texas bugs are extra “juicy”
Only the inside left pad was worn much, it probably still had enough life left to make it to Alaska and back but I replaced it anyway.Wh-a-a-a-at?
+1.Did you wonder why only one pad wore?
Something like that comes down to how well the calliper moves when the brakes are applied. I changed my TDMs over to braided lines as the rubber lines add flexibility to the pressure and will release in the line before the calliper.Did you wonder why only one pad wore?
Sent from my iPhone using Tapatalk
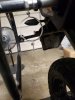
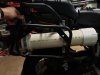
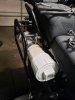
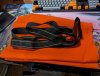
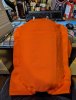
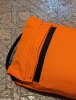
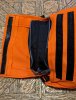
Way back before I made the square tool tube, I made one out of a 4" piece of ABS pipe. I would have had to contend with some clearance problems if I used the heavy thick end caps, so I made a door and a nose cap out of layered ABS sheet. It kept the tube fairly streamlined and out of the way (or at least as streamlined as a big bazooka strapped to the side of my bike could be).Well, I think I about got this project whipped! More details on my thread "what TenereGUY has been up to". I will finish off the details tomorrow night. I was going to do some bracing but I may put several opposing heavy duty zip ties to quell side to side movements. It is pretty stiff right now. My first placement gave me 8.75" of clearance for suspension compression... but that’s to close. So I can move it up about an inch and that will also shorten that back bracket so it will be stiffer.
The best news of the night is that I was able to reuse the back bracket and put it on the front! View attachment 102894
Moving it up an inch. Don't worry all bolts will be matching in the end product. I just had tose in my spare bolt can!View attachment 102893
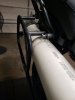
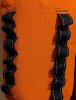
Slight rake back so tools don't push against the opening and fall out when I open it. Hopefully I won't need to!View attachment 102895
Might just be in the way for a passenger... but I don't plan on having one on this trip. If my son and daughter in law come home I can remove it while they ride around.


I think thats when you wipe the crap off the instrument cluster to see the fuel gauge.Cleaning?
What is this…. “Cleaning”… of which you speak???
That's a pretty slick contraption! Like the emblem on it too.Way back before I made the square tool tube, I made one out of a 4" piece of ABS pipe. I would have had to contend with some clearance problems if I used the heavy thick end caps, so I made a door and a nose cap out of layered ABS sheet. It kept the tube fairly streamlined and out of the way (or at least as streamlined as a big bazooka strapped to the side of my bike could be).
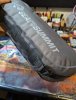

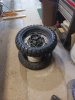


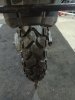
That’s a nice looking tyre. I’ll have to check them out.Mounted up a Mitas E07+ for the rear. I'm getting good at the tire change thing. My new high tech tire changing stand worked well. Also torqued the spokes. About half of them were under torqued. View attachment 103079View attachment 103082
I see you're from Down Under... I just learned about MotoZ Tires from Down Under and love them.That’s a nice looking tyre. I’ll have to check them out.