What you did to your Tenere today??!!

eemsreno

Well-Known Member
Founding Member
2011 Site Supporter
2012 Site Supporter
2013 Site Supporter
2014 Site Supporter
Joined
Nov 25, 2010
Messages
3,227
Location
On your way to everywhere, , Iowa
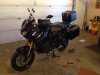
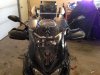
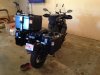
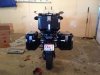
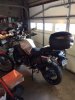
Started our 17 and let it run while wify sat on it trying out her new heated jacket liner. Snow and ice all over out there.
 

Stridey

Member
Joined
Jun 21, 2015
Messages
400
Location
Ilminster, Somerset UK
stutrump said:
Are they Heidenau's?
Hi Stutrump. No they are Mitas E07 on the replacements and I think Karoo 3 originals.
The E07 Are a well rated tyre on here for 50/50 on/off road. I’m probably using them on the Tenere Exp and the TD both in Wales.


Sent from my iPhone using Tapatalk
 

stutrump

Active Member
Joined
Jul 25, 2013
Messages
942
Location
london uk
Thanks Stridey. I'd like to do that Tenere day. Everytime i read this Im not at home with my diary...but I will check soon. Because of work I probably wont be able to commit until the last minute but Im hoping i can see you there
 

bob dirt

Member
Joined
Jun 24, 2013
Messages
428
Location
phoenix arizona
Stridey said:
Hi. I’m interested in why the change from the Karoo 3 to E07? Thanks


Sent from my iPhone using Tapatalk
I bought this bike used. I really liked the Mitas on my last bike. They are quiet on the tarmack and bite pretty good on the dirt.
 

Scrogs10

Member
Joined
Sep 23, 2016
Messages
59
Location
dawlish
Today I fitted a 2015 kick stand onto my 2013 Tenere.

I sometimes have a problem getting the side stand down when I'm wearing my Adventure boots. I know the gen 2 has an upgraded stand over the gen 1.

I havn't tried it out on the road or with my boots on but I am confident it is an upgrade. the much larger lever? on the stand to help with lowering the stand really helps and I think the newer gen 2 is a fraction longer than the original improving the lean angle on the stand a little.

And if anyone is wondering it is a simple swap with the exact same fittings on both stands.
 

bnschroder

2014 Super Tenere ES
Joined
Nov 17, 2014
Messages
559
Location
Atlanta
Doing some maintenance and checking connectors.
Can anybody tell me how to remove this panel? I have the two screws on the side but can’t figure out what’s holding the middle and I only have a 2012 Service Manual and this part is new.


Sent from my iPhone using Tapatalk
 

lacofdfireman

Member
2014 Site Supporter
Joined
Sep 15, 2014
Messages
339
Location
St. George
bnschroder said:
Doing some maintenance and checking connectors.
Can anybody tell me how to remove this panel? I have the two screws on the side but can’t figure out what’s holding the middle and I only have a 2012 Service Manual and this part is new.


Sent from my iPhone using Tapatalk
Doesn’t seem like it but it’s just press fit into there. Use some steady upward pressure and it will pop off. Don’t go crazy though.
 

yoyo

Well-Known Member
Joined
Jan 30, 2016
Messages
915
Location
Swansea UK
I'm sure I had to remove the small piece was the Yamaha logo on it first and there was a fixing behind that.
 

bnschroder

2014 Super Tenere ES
Joined
Nov 17, 2014
Messages
559
Location
Atlanta
lacofdfireman said:
Doesn’t seem like it but it’s just press fit into there. Use some steady upward pressure and it will pop off. Don’t go crazy though.
Thanks! Always slightly nerve-racking when you tug on plastic, hoping it will come off without cracking.


Sent from my iPad using Tapatalk
 

Super08

Well-Known Member
Joined
Aug 6, 2017
Messages
357
Location
AB, Canada
Installed an Altrider rear rack to replace the Givi one I had on the bike. The Altrider one moves the top box back further to make more room for a passenger. My custom seat done by Laam Custom Seats arrived today as well as my new Givi Outback panniers to replace the Yamaha ones that came on the bike. Now they match the Givi top box I bought last summer. I am still waiting for the parts to arrive so I can install Yamaha heated grips. I also picked up a set of Piaa driving lights that I will install at the same time as the grips. That way I only have to mess with the wiring once.
 

Attachments

Top