Valve adjustment - more lessons learned

tubebender

Active Member
Founding Member
2011 Site Supporter
2012 Site Supporter
2013 Site Supporter
2014 Site Supporter
Joined
Jan 6, 2011
Messages
656
Location
Oceanside, CA
Nice write up and pics.

I really like this shot. Shows how asymmetrical the frame is.

F16Viper68 said:
 

jaeger22

Member
2012 Site Supporter
2014 Site Supporter
Joined
Jul 1, 2012
Messages
358
Location
Orlando, FL
This an excellent thread! I am sure it will be a great help to those doing there own valve adjustments in the future. Also check out the great how to blog by greg the pole above.
This only applies if you have to do adjustment and remove and replace the cams. But if you do, I wanted to let you know about the trap I got caught in. Believe me it is easy to do. I have adjusted valves on many engines over many years and never had a problem before but this one bit me big time. :-[ I ended up pulling the motor and replacing two valves.
This is from my "Valve adjustment Nightmare" thread. (You can read the whole sordid tail here http://www.yamahasupertenere.com/index.php?topic=9344.0)

There are two related issues. This one just helps hid the real problem.
First when you put in the second cam (intake) with the timing mark aligned, it is actually pushing down a bit on the number 2 cylinder intake valves. If you look closely in this picture you can see that the cam will not quite lay flat in the bearings because the #2 lobes are hitting the valves.


When you put the bearing caps on and tighten them down, it will cause the cam to twist hard to the right (clockwise). That is why the manual tells you to tie wrap the chain to the sprocket. If you don't the cam will rotate and jump a tooth on the chain. You can see the tie wraps in this picture:


I found that it sometimes (but not always) requires that you install the cam one tooth to the left (counterclockwise) of the correct alignment before you tighten the bearing caps down because the cam will twist so hard that even with tie wraps locking the chain to the sprocket, it pulls the chain so tight that it ends up a tooth to the right.
All that is OK, just a bit of a pain when the motor is still in the frame. But all that tension helped hide the real problem.
The BIG problem. ???
Because the cylinder slants forward, the rear (intake side) chain guide flops forward and down when the chain is loose. It can go way forward as you can see in this picture.


That will allow the chain to slip around the guide in the wider sections of the cam chain channel. As you can see here.


This is very easy to see when the motor is out of the frame but when installed in the bike it is very hard to see. And from the bottom. looking under the clutch cover, all looks normal. So while I was installing the cam and fighting the above cam rotation and tension issues, I noticed the chain seemed really tight to get over the sprocket but assumed it was because of the cams hitting the valves. ::005:: Now that I have done it with the motor out I can see that is should not have been that tight.
So the top of the guide got twisted to the side instead of behind the chain and that allowed the tensioner to push directly on the cam chain instead of on the guide. I could see from the groves worn in the case and the guide exactly how the chain was running. So it started up and ran fine. But of course, the chain slowly ate away the tip of the tensioner until the plunger fell out of the tensioner body and the cam chain then jumped off. Then the whole valve/piston love thing happened. :'(
So the bottom line is, if you take the cams out, double check the cam chain guide alignment before you button it up. It should look like this when you are all done.


John
 

F16Viper68

Member
2012 Site Supporter
2014 Site Supporter
Joined
Nov 28, 2012
Messages
96
Location
Crawfordville, FL
Thanks for adding to the thread John. I tried to get pictures of the cam chain guide but honestly with the engine in it's nearly impossible to see, never mind get a decent picture. I checked that guide before and after to ensure I didn't end up in the same boat. It's so hard for me to believe that can even happen and run for 50 miles!

Dave...
 

jaeger22

Member
2012 Site Supporter
2014 Site Supporter
Joined
Jul 1, 2012
Messages
358
Location
Orlando, FL
I tried to get pictures of the cam chain guide but honestly with the engine in it's nearly impossible to see, never mind get a decent picture
Exactly Dave, that is what makes this trap so insidious. I now know to use a mirror to check it but is got me the first time. :(

It's so hard for me to believe that can even happen and run for 50 miles!
Yep these motors are really tough. They can handle anything except a bad mechanic. ::)
 

F16Viper68

Member
2012 Site Supporter
2014 Site Supporter
Joined
Nov 28, 2012
Messages
96
Location
Crawfordville, FL
jaeger22 said:
Exactly Dave, that is what makes this trap so insidious. I now know to use a mirror to check it but is got me the first time. :(
Yep these motors are really tough. They can handle anything except a bad mechanic. ::)
I think that one could get the best mechanics. I seriously considered getting one of those cheap borescope cameras from Harbor Freight.

Dave...
 

Mzee

Active Member
Joined
Mar 17, 2013
Messages
823
Location
Johannesburg
The pictures are excellent even though I don't understand anything about valves. That is surely beyond me.

But for the first time, I can clearly see where the spark plugs are located. It is something I want to learn to do myself. For the first time I can clear see where the CCT is located and where it has been removed.

As I said the rest is beyond me.
 

Chickengrease

Member
2013 Site Supporter
Joined
Jan 29, 2013
Messages
66
Location
Wheatfield, IN
One more thing:

If you're checking metric clearance numbers, use your metric feeler gauges. If your numbers are imperial/standard, then use that set for your equations. Don't mix up the two. Sounds impossible to screw up, but I managed.
 

BWC

Active Member
2011 Site Supporter
2012 Site Supporter
2013 Site Supporter
2014 Site Supporter
Joined
Jul 31, 2011
Messages
490
Location
Canada
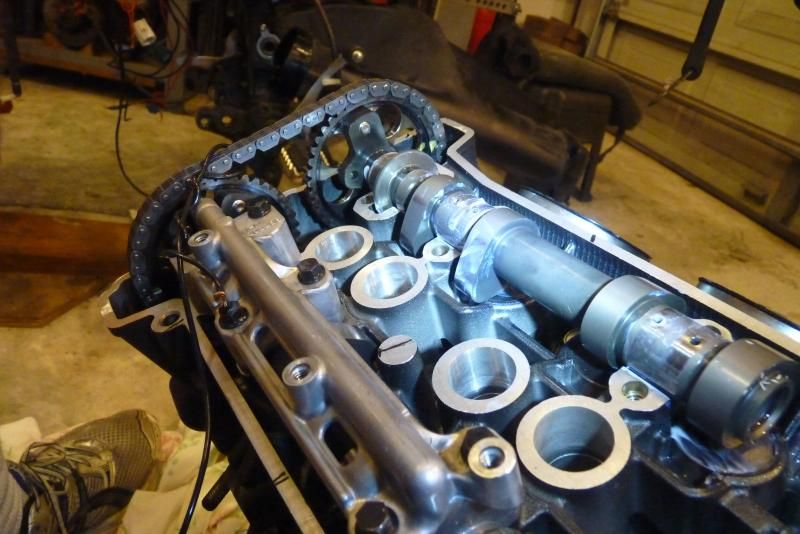
Thought after doing a valve adjustment I could add a bit more to this thread. Bike is a 2012 with 81,000 km and has always run well. I had checked the valve clearence at 50,000 km and found a few of the valves were near the minimum, so I knew I would probably need an adjust this time around. Clearances before the adjustment were Exhaust: .009-.008-.008-.008. Intake: .005-.005.005.004.thousandths. Clearance after adjustment Exhaust: .010-.010-.011-.011. Intake: .006-.006-.006-.006 thousandths. The Hotcams shim kit dosent have the finer range of shim thickness that Yamaha uses from the factory. Managed to use most of the removed exhaust shims for the intake settings. The new settings are at the large end but should allow a good while before they need to be adjusted again.With the factory shop manual in hand, I got down to it .
As a plan B to double check my work I put a few witness marks on the intake and exhaust sprockets and the lower cam chain drive sprocket to chain and timing marks. Green tape is just a reminder to check the bolt holding the pick up rotor as I had it off to replace the cam chain while in there. As the cam chain is reasonably priced at around $25.00 I took the opportunity to replace it as it was easy to do once you are doing a valve adjust.


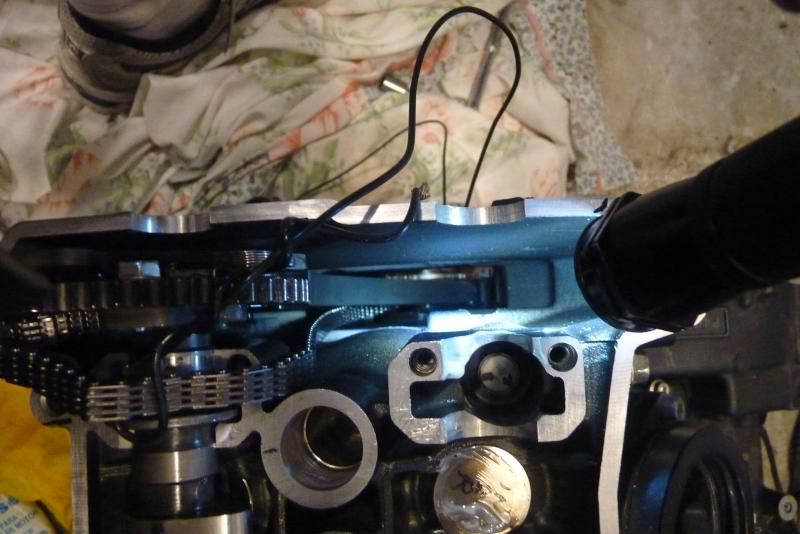
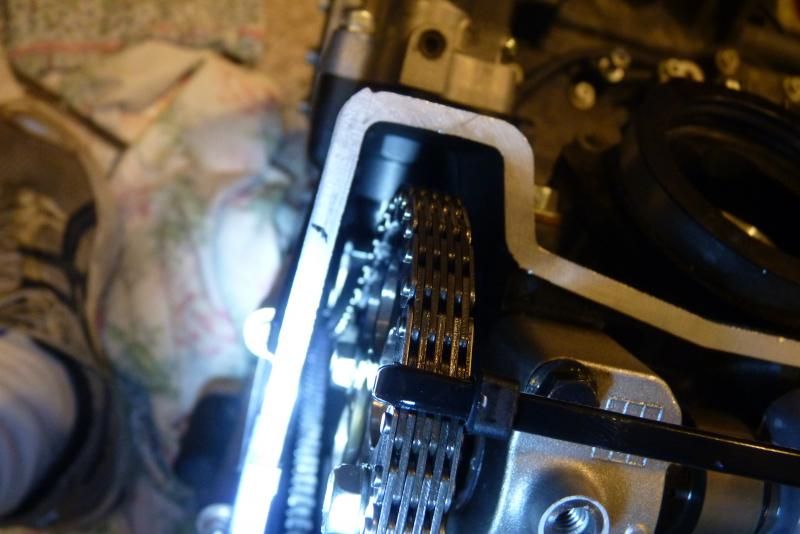
I ended up having to use 2 zip ties to stop the chain from jumping when I was reinstalling the intake cam. I think the first zip tie I tried wasn't tight enough or stretched and it jumped a tooth in the final tightening of the cam caps on the first try.


Here is where the witness marks paid off as during the final tightening of the intake cam cap bolts on the first try, I heard the "click" and could see right away the chain had jumped a tooth. I can see how a valve adjust could go sideways here if you didn't recheck all the timing marks as the chain still appeared to be tight between the cam sprockets and looked good to go. As a side note the cam chain also jumped a tooth when I removed the tensioner when the engine was set to the correct timing marks for cam removal. Something to watch for if you are just replacing the cam chain tensioner.


Removing the valve lifters was a little easier with the help of some strong magnets which also helped keep the valve adjusting shims in place on the underside of the lifter when removing it.
Another tip is to put a small rag down in the cylinder head in the front, middle of the exhaust cam where there are two oil drain holes that would love to swallow up a valve shim if given the chance.


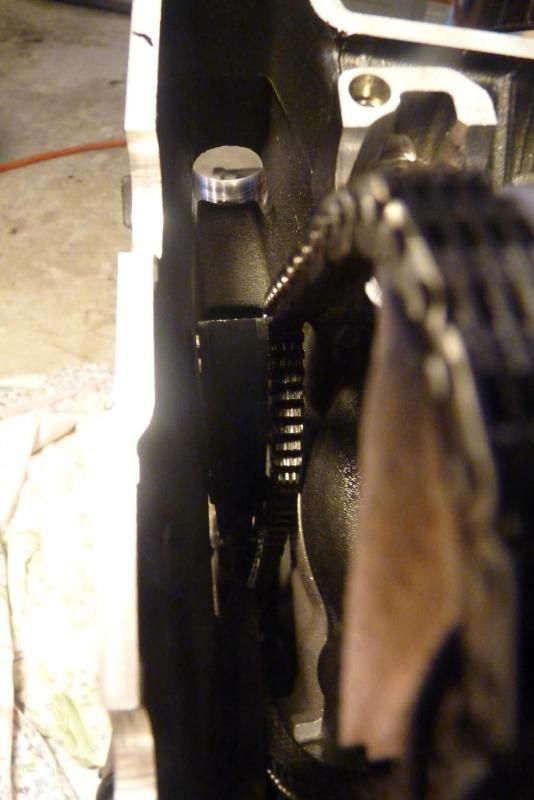
Witness marks moved from the old chain to new for re installation


Difference in length between the old and new chain. New chain is the bottom one. Chain replacement at this mileage is not really necessary based on the small amount of wear seen here. As others have reported it looks like it would be good to at least 160,000 kms.


Had a good look at the front and rear chain dampers and there was no sign of wear from the cam chain.


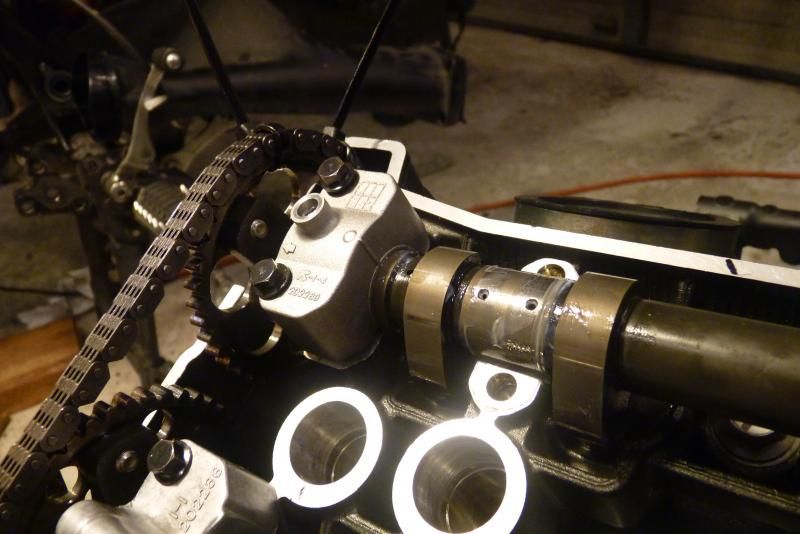
Took this pic. to show that it is important to make sure the intake cam cap alignment dowels are properly located before you tighten down the caps or as it has been reported you can damage them. Just had a little moly grease on there to make sure there was no chance of binding.


Started it up and after a few cycles of the fan hooked up the Harmonizer and found a small imbalance


A little adjustment to the left hand throttle body air screw and good to go.


A lot of credit goes to the others that have posted there findings after doing a valve clearance adjust. Was a big help when my turn came.
And one last note regards resetting the cam chain tensioner. I have had the 2014 one installed now for about 20,000 km and no more chain noise on start up. This time it was a bit more of a challenge to reset it before installation. I ended up taking it apart and removing as much oil from the internal parts, then with it screwed to a small board and my battery drill on low speed I managed to get the plunger back in and ready for install. Was a fair bit harder to do than the 2012 one I had removed a while back.
 

scott123007

Well-Known Member
Joined
Jul 27, 2012
Messages
1,484
Location
Jupiter, Florida
Great info BWC. I especially like the idea of painting the three marks on the chain and sprockets before removal so it becomes a no brainer on install where everything needs to end up.

Just an FYI though...
Throughout the '70's I was a mechanic at our local Kawasaki dealership. Kawasaki Corporate would always hold service seminars when "new" engine design (kZ650, shim under bucket) or new "items" (Jetski's) were about to be released. It was like a mini AMI course to show techs the correct way to approach servicing or rebuilding the engines and drive trains since there was nothing like them previously. One thing that I never forgot was the point they made about ALWAYS putting the locating dowels for the cam caps in the HEAD before installing the cam caps. Their explanation is a little harder to put into words than to show, but in a nutshell, dowels should always be put into the side of the object that stays stationary when the two pieces are being put together. It's not that it can't be done the other way, it just increases the chance of misalignment, and collapsing the dowels or galling the head :)
 

BWC

Active Member
2011 Site Supporter
2012 Site Supporter
2013 Site Supporter
2014 Site Supporter
Joined
Jul 31, 2011
Messages
490
Location
Canada
scott123007 said:
One thing that I never forgot was the point they made about ALWAYS putting the locating dowels for the cam caps in the HEAD before installing the cam caps.
Thanks to a previous post on this I was aware that would be the best way to re install the locating dowels into the cylinder head first. When I removed the caps, all 8 locating dowels stayed in the cam caps. I tried to remove them by hand but no luck. Tried with a shop rag and pliers, but they seemed to not want to come out easily so they stayed in and went back together the same way. I have noticed on previous bikes of mine, Honda, Kawasaki etc.the locating dowels stayed in the head, or the caps and could be easily removed. It seems being careful while tightening down the intake cam caps evenly is extra important on this bike.

Also found this product worked good for installing the new cam cover gasket after it had been cleaned. Installed the new gasket and put the cover aside while doing the adjust to let the adhesive set up. Holds the gasket in position well while fitting the cover back on, which can be a bit challenging ::)


kk3an

New Member
Joined
Jun 7, 2012
Messages
17
Location
East Berlin, PA
If anyone's on the fence about doing the first valve check - do it. With my 2014 Tenere, 29,000 miles, I finally dug into the job to find ALL eight of the valves tight. Each of the intakes were technically within spec, but were all exactly at the minimum clearance (barely). Each of the four exhausts, on the other hand, were far tighter than minimum spec - with the tightest on Cylinder #1 measuring .102mm clearance (the minimum exhaust spec being .22mm).

The bike did have difficulty starting, and while it's not all put back together yet (waiting on the shim kit), I attribute the hard starting to the very tight exhaust valves.

Dan
 

RED CAT

New Member
Joined
Feb 5, 2012
Messages
1,110
Location
Calgary, Canada
Are the valve clearences different on the Gen 1 (2010-2013) than the Gen 2 (2014-2015). I did the valves on my 2012 a while back but now have a 2014. Anyone know the new Clearences??? Thanks. Can't seem to find that info anywhere.
 

greg the pole

There are no stupid questions, only stupid people
Joined
Apr 18, 2012
Messages
3,343
Location
Calgary AB
RED CAT said:
Are the valve clearences different on the Gen 1 (2010-2013) than the Gen 2 (2014-2015). I did the valves on my 2012 a while back but now have a 2014. Anyone know the new Clearences??? Thanks. Can't seem to find that info anywhere.
I don't think the clearances will be any different.
 

RED CAT

New Member
Joined
Feb 5, 2012
Messages
1,110
Location
Calgary, Canada
The head, valves and pistons are different on the Gen 2 bikes. So I'm pretty sure the clearences are different too.
 

holligl

Find the road less traveled...
Joined
Nov 13, 2015
Messages
2,255
Location
IL/AZ
I bought my 2014 used and it just turned over 20K miles.
Couple questions:
What does the typical dealer charge to do the valve check/adjustment?
Does it need to be done by a dealer to maintain YES warranty coverage?
Thanks!
 

kvango

New Member
Joined
Sep 20, 2014
Messages
13
::004::
Thanks for all the info here, just did the valve adjust and throttle body sync (using 2 stroke oil in 20' of tubing as old-school manometer/balancer). I see how easy it would be to have the cam chain rail get pushed over to the side. Also the cam chain can slip so fast you can't see it skips a tooth or two. Definitely check cam rail before and after CCT installation, and check cam gear marks before/after CCT installation. Damn Yamaha could have made this easier with a tiny bit more valve cover clearance, and they put the gear marks on the wrong side.

http://advrider.com/index.php?threads/the-yamaha-super-tenere-xt1200z-big-thread.545850/page-1646#post-30674637

 
Top