Tonight's Episode!
Let me apologize first because the easiest things to build are the hardest to explain.
So this is a long post!
In the process of making these Crash Bars the side guards need to be strong but removable. Which means some bolted "T" joints. There are a lot of ways to accomplish these and on my Crash Bars I have bushing sleeves welded to the main loop where the side guards will attach using threaded inserts in the SG Tubing.
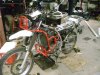
Like the ones on the lower section of this side bar.

The idea is to run a bolt through the Main Loop and into some threaded inserts welded inside the tubing. Today I made those inserts. And I'll show you how I did it.
First you need some threaded inserts that will fit inside your tubing. There are a lot of ways to accomplish this task. Just so you know, I'm staying with all metric bolts the same size and thread pitch that Yamaha uses on their other joints to simplify my onboard tool kit should I need to take the bike apart in BFE someday.
In this case the crash bar tubing is .75 wall 1 inch tubing. And the inner diameter just happens be real close to the inner diameter of a 1 inch hole saw blade.
I'm using 3/8 flat steel for the inserts. I sometimes use 1/2 plate to cut my inserts out of. In this case I used angle iron because the angle iron parts are for another project and I needed the holes in it anyway. Nothing like killing two projects with one cut.

This is the insert part I'm after.

Next I take that round part and thread it. In case you're wondering why I don't thread it before I use the hole saw, the 1/4 inch pilot bit is smaller than the 12 mm hole I'm going to thread. So after I drill out the insert I have to drill out and tap the insert like this.

And since I need four they look like this.

The inserts are a tight fit, but I'll cross drill the tubing before I tap them into the tubing and then weld them in place with a Rosette Weld through the holes in the side of the tubing to make them even stronger.
This will help make that a little clearer.

Still with me? Now when I go to bolt the tubes to the main loop I mentioned, they fit inside bushing sleeves. Here's a TIP. Tractor Supply sells DOM bushing sleeves that have a perfect 1 inch inside diameter. I will fish mouth the bushings to fit the angle of the loop joint tomorrow. If someone doesn't understand the term "Fish Mouth" let me know and I'll show some close up pictures of how and why that is so important. And even how they are made!
This picture will show you the tubing inside the bushing and the inserts next to them.
(sorry for the crappy picture, I didn't realize it was bad until I downloaded it.)

Here's a close up of the Tractor Supply Bushing should you want to try this. Very nice with no welded seam on the inside wall!

Tomorrow I'll cut the fish mouth angles on the bushings to match the tubing's angle of attachment at the joint. I'll show you an easy way to match (or duplicate )the fish mouth angle to another tube, no matter how extreme it is.
And I'll cross drill the tubing on both the Main Loop and the Side Guards for the 12 mm bolt that will hold them together. I built a drill guide that is fool proof for drilling at almost any angle. I'll show it tomorrow. It's so simple you'll do a face palm! DOAH!!!!
Doesn't look like much work for one day but I assure you I only spent about 2 hours total overall doing what you see in the pictures. And that includes cutting and drilling with the hole saw. I have other projects underway, so I don't get to concentrate on just one project at a time while I'm out there. Sometimes it's set the band saw to making a cut then go do something else until it's cut.
Plus it's about 35 degrees out in the shop, so I spent a lot of time in front of the heater too!!!!!
It's a big shop and takes a lot to keep a place that big warm enough to stay comfortable in.
")