SkunkWorks
Well-Known Member
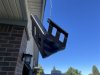
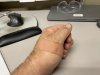
While inspecting my bike before my Moto-Camping Trip to the Desert-Southwest, I noticed my Top-Case had a slight amount of movement in relation to the back of the bike.
More so than it should anyway.
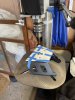
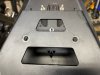
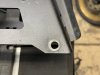
Further inspection found that the Rack was slightly flexing near the mounting-bolts.
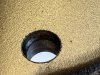
I disassembled it from the bike, and found the lower mount-plate had started to crack around the bolt-holes.
Now before I go any further, I just want to say that I am not insinuating that this is in any way a bad product............
Bumot makes one helluva durable Luggage System (you'll see what I mean when I post my Trip-Report thread from my SW-Desert Tour)
I'm not gonna lie............I do overload my top-case when I'm touring with this bike.
Space is always at a premium when I'm packing for a moto-camping trip, and I always end up using ALL of it that I have.
I also ride some pretty rugged stuff from time to time with my luggage on, so I cannot say anything bad about the quality of these Bumot products.
With that said, I now needed to figure out what I was going to do to fix it?
After searching around my Shed and Garage, I did not have any sheets of metal in the thickness I wanted to use.
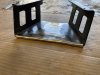
I did have some wider flat-stock that was thick enough, so I figured I would just make my own panels.
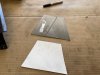
I first had to cut out some cardboard templates.
Next I had to figure out the angles for my cuts.
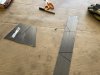
I needed enough pieces to make two identical panels.
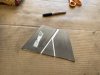

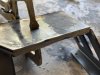
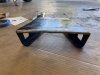
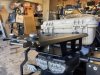
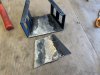
Next was to stitch them all together, so I broke out my Welder.
Feel free to flame me for my welds.................I'll be the first one to tell you that I can weld, but I'm not a welder.
I'm certainly a better "Grinder" than I am a "Welder"
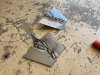
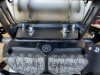
After grinding. Just need a final trimming.

More so than it should anyway.
Further inspection found that the Rack was slightly flexing near the mounting-bolts.
I disassembled it from the bike, and found the lower mount-plate had started to crack around the bolt-holes.
Now before I go any further, I just want to say that I am not insinuating that this is in any way a bad product............
Bumot makes one helluva durable Luggage System (you'll see what I mean when I post my Trip-Report thread from my SW-Desert Tour)
I'm not gonna lie............I do overload my top-case when I'm touring with this bike.
Space is always at a premium when I'm packing for a moto-camping trip, and I always end up using ALL of it that I have.
I also ride some pretty rugged stuff from time to time with my luggage on, so I cannot say anything bad about the quality of these Bumot products.
With that said, I now needed to figure out what I was going to do to fix it?
After searching around my Shed and Garage, I did not have any sheets of metal in the thickness I wanted to use.
I did have some wider flat-stock that was thick enough, so I figured I would just make my own panels.
I first had to cut out some cardboard templates.
Next I had to figure out the angles for my cuts.
I needed enough pieces to make two identical panels.
Next was to stitch them all together, so I broke out my Welder.
Feel free to flame me for my welds.................I'll be the first one to tell you that I can weld, but I'm not a welder.
I'm certainly a better "Grinder" than I am a "Welder"
After grinding. Just need a final trimming.