Kurgan
Well-Known Member
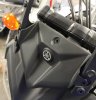
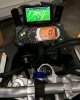
I've been running this GPS setup on my 2013 for 4-1/2 years now and it's worked well. I also installed this same setup on another Gen 1 bike the same day and that owner also hasn't had any issues with it. Will this setup work for a Gen 2 bike? I don't know what those have for room considering the different windshield setup. Take a look at the pics below as a reference.
The basic mount only requires 2 parts, from which you will add the actual attachments for your GPS:
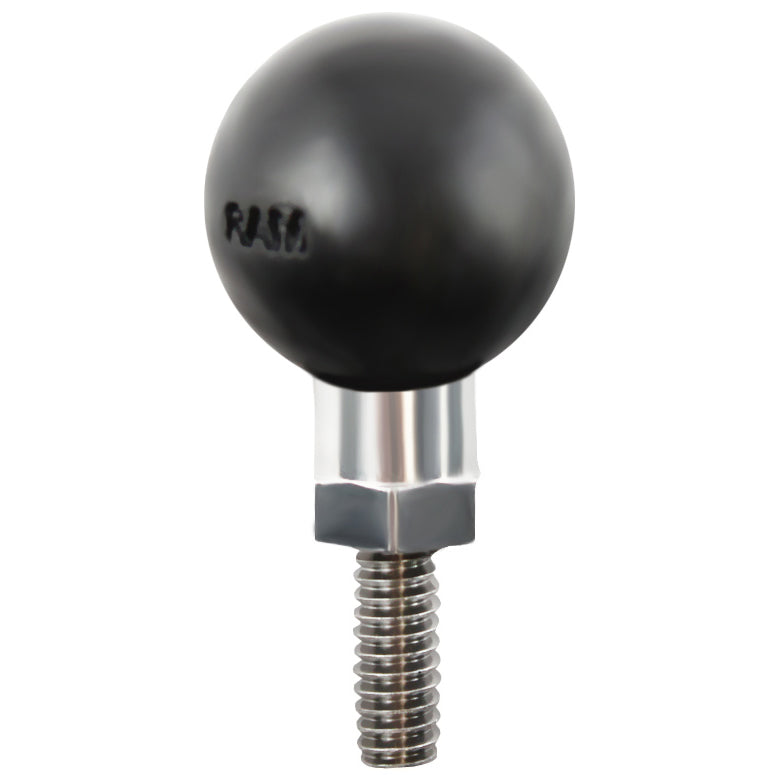
RAM Ball Adapter with 1/4"-20 x 1/2" threaded stud
 www.rammount.com
Be sure to get this one as it has flats built in so you can tighten it down with an open end wrench.
www.rammount.com
Be sure to get this one as it has flats built in so you can tighten it down with an open end wrench.
1/4"-20 threaded Clip Nut / Speed Nut (they go by different names depending on the vendor)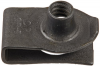
That pic shows it upside down, be sure to get one that has that much threaded "nut", or an actual nut that's spot welded in - you want that much thread engagement.
Those 2 pieces were less than $12.00. I meant it when I said it's inexpensive.
Here we go..
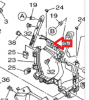
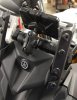
Pop the windshield off and that top hole in the headlight housing trim panel, where 1 of the 3 plastic push pins normally resides, is where the RAM ball will be mounted.
After your remove this panel you can see the support structure beneath.
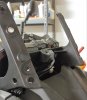
That top hole needs to be enlarged a bit, I used a uni-bit since it was already chucked in my drill from another project.
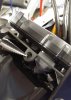
Insert that threaded speed nut in to that support with the enlarged hole. I thought I had a pic of the speed nut installed but I can't locate it. It can only fit one way and will be very obvious when you're looking at it. Now, replace the trim panel, securing it with the 2 plastic push-pins that are on the sides. Next, screw the RAM Ball Adapter in and tighten it down with a wrench.
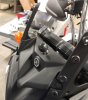
At this point, you just need to determine what size RAM arm you need along with the mount for your specific GPS.
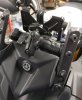
Put the GPS in the position you want it and tighten everything up.
If you're not running off of the internal GPS battery, run the 12V power adapter and you're done.
Since installing it, I snugged down the RAM ball once or twice (less than 1/4 turn each time) and snugged down that RAM extension arm (maybe 1/8 turn) once.
It's not moved and has been a pretty stable for street riding all over the potholed roads of NW Ohio and Michigan.
What's nice is that if you already have your GPS mounted near the handlebars, you can use this basic setup for another accessory. mount.
The basic mount only requires 2 parts, from which you will add the actual attachments for your GPS:
RAM Ball Adapter with 1/4"-20 x 1/2" threaded stud
RAM® Ball Adapter with 1/4"-20 x 1/2" Threaded Stud
The RAM-B-273-1U consists of a 1" rubber ball connected to a 1/4"-20 X 0.5 threaded post.
www.rammount.com
1/4"-20 threaded Clip Nut / Speed Nut (they go by different names depending on the vendor)
That pic shows it upside down, be sure to get one that has that much threaded "nut", or an actual nut that's spot welded in - you want that much thread engagement.
Those 2 pieces were less than $12.00. I meant it when I said it's inexpensive.
Here we go..
Pop the windshield off and that top hole in the headlight housing trim panel, where 1 of the 3 plastic push pins normally resides, is where the RAM ball will be mounted.
After your remove this panel you can see the support structure beneath.
That top hole needs to be enlarged a bit, I used a uni-bit since it was already chucked in my drill from another project.
Insert that threaded speed nut in to that support with the enlarged hole. I thought I had a pic of the speed nut installed but I can't locate it. It can only fit one way and will be very obvious when you're looking at it. Now, replace the trim panel, securing it with the 2 plastic push-pins that are on the sides. Next, screw the RAM Ball Adapter in and tighten it down with a wrench.
At this point, you just need to determine what size RAM arm you need along with the mount for your specific GPS.
Put the GPS in the position you want it and tighten everything up.
If you're not running off of the internal GPS battery, run the 12V power adapter and you're done.
Since installing it, I snugged down the RAM ball once or twice (less than 1/4 turn each time) and snugged down that RAM extension arm (maybe 1/8 turn) once.
It's not moved and has been a pretty stable for street riding all over the potholed roads of NW Ohio and Michigan.
What's nice is that if you already have your GPS mounted near the handlebars, you can use this basic setup for another accessory. mount.
")