GSequoia
Active Member
With the lack of good documentation on the ACD Skid plate installation I thought I would outline my installation here. I've been meaning to post this thread since I installed it back in March but tings kept getting in the way.
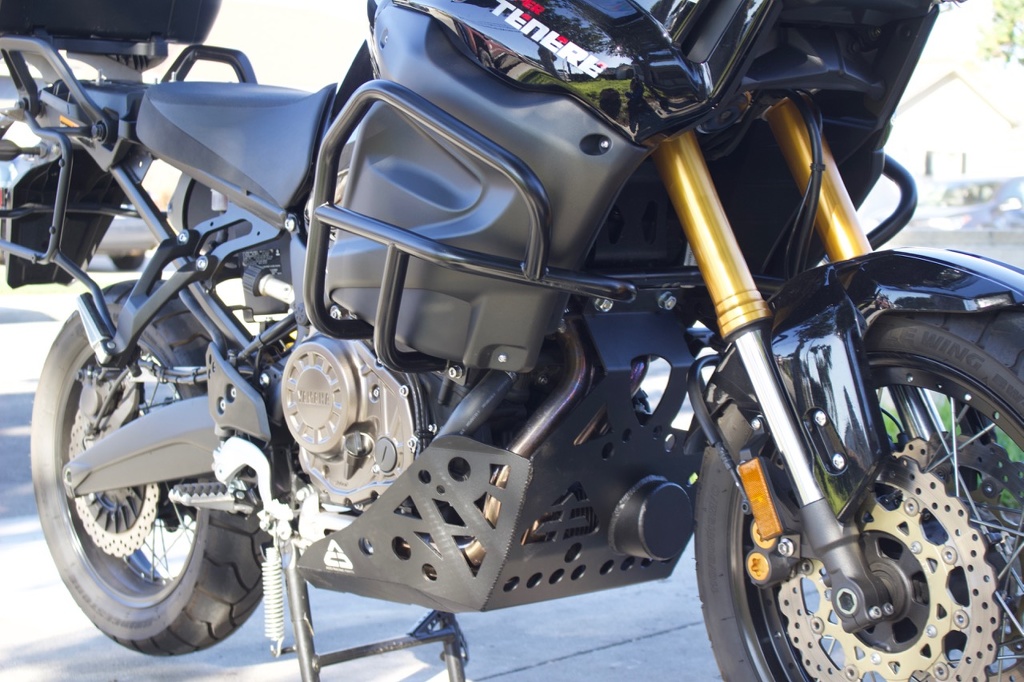
So you bought a nice new ACD skid plate and want it on the bike, eh? Well this this is *massive,* isn't it.
The installation is pretty straight forward with just a few gotchas to keep an eye on.
The first thing you'll do is set the bike up on the side stand. Now using a 17mm socket remove the two lower engine mount bolts (the two big guys right above the header).
With that out of the way you need to get to work on the center stand bolts.
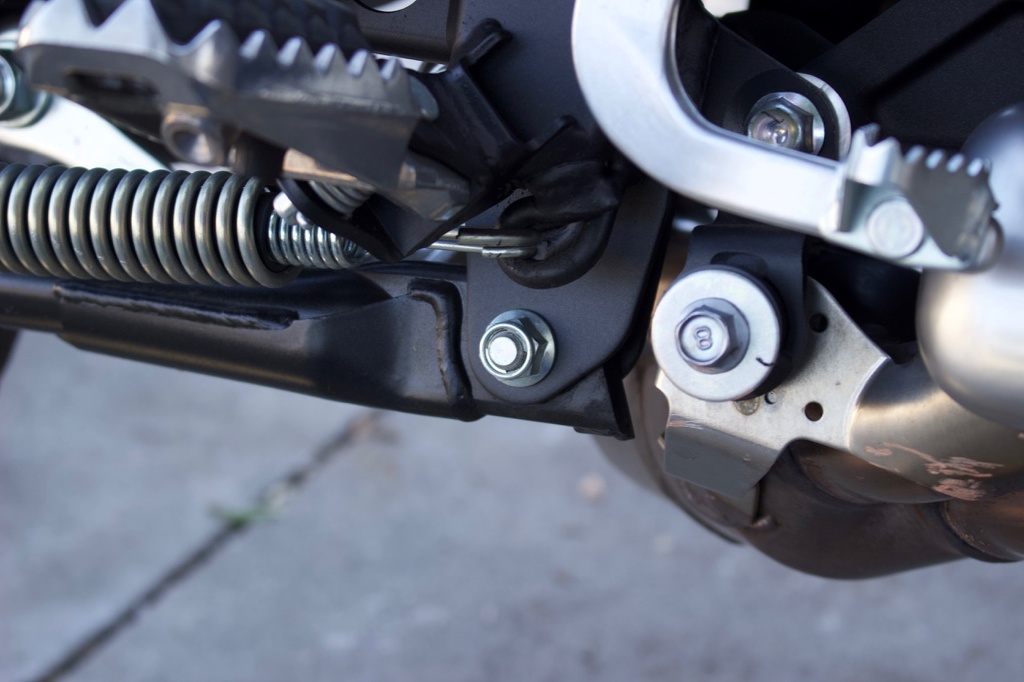
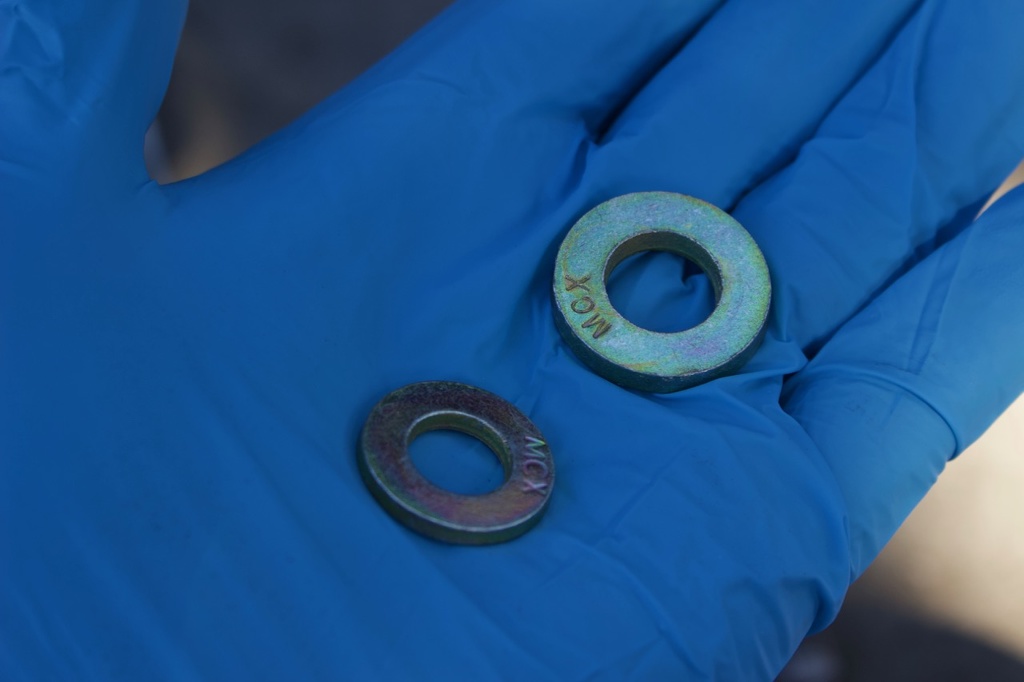
Start by removing one side first. Using a 14mm socket remove the center stand nut on the outside of the frame.
Now carefully knock out the stepped bolt.
Note that once the bolt comes out your center stand is going to shift because of the spring pressure. This is normal.
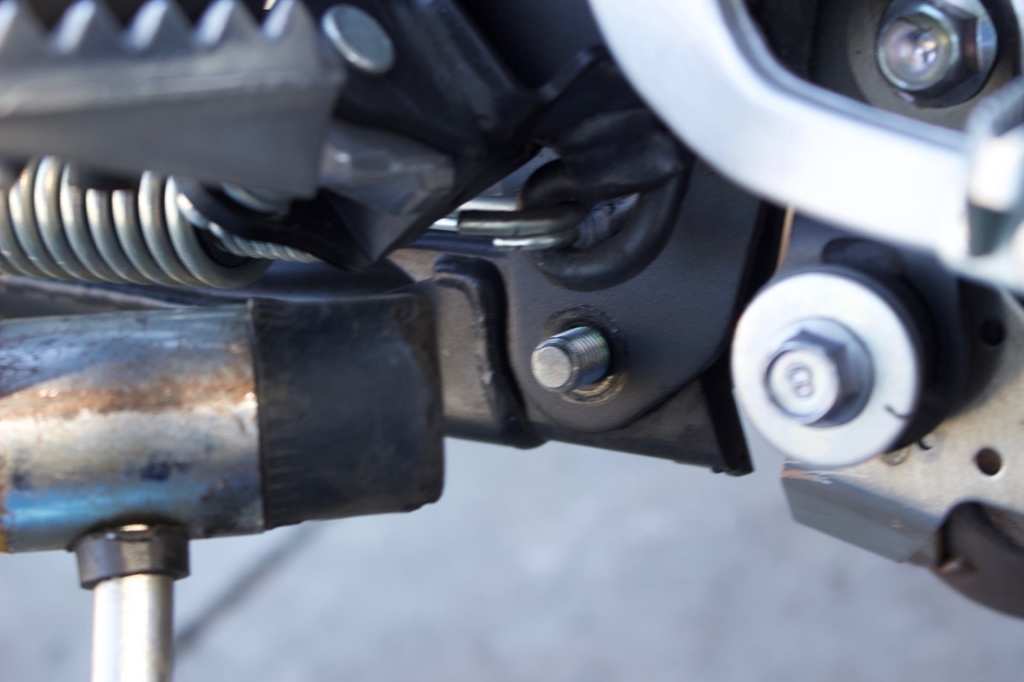
Now you want to insert the supplied spacer. Grease the spacer and insert it from the inside with the collar facing inside. You will need to wrestle with your center stand to do this, I found that it was easiest to have a pry bar (I used a steel tire iron) to pry against the center stand until the holes were visually lined up and work it in. Work the spacer in until the collar meets the inside of the frame with the inner lip of the collar is flush with the outer frame spur.
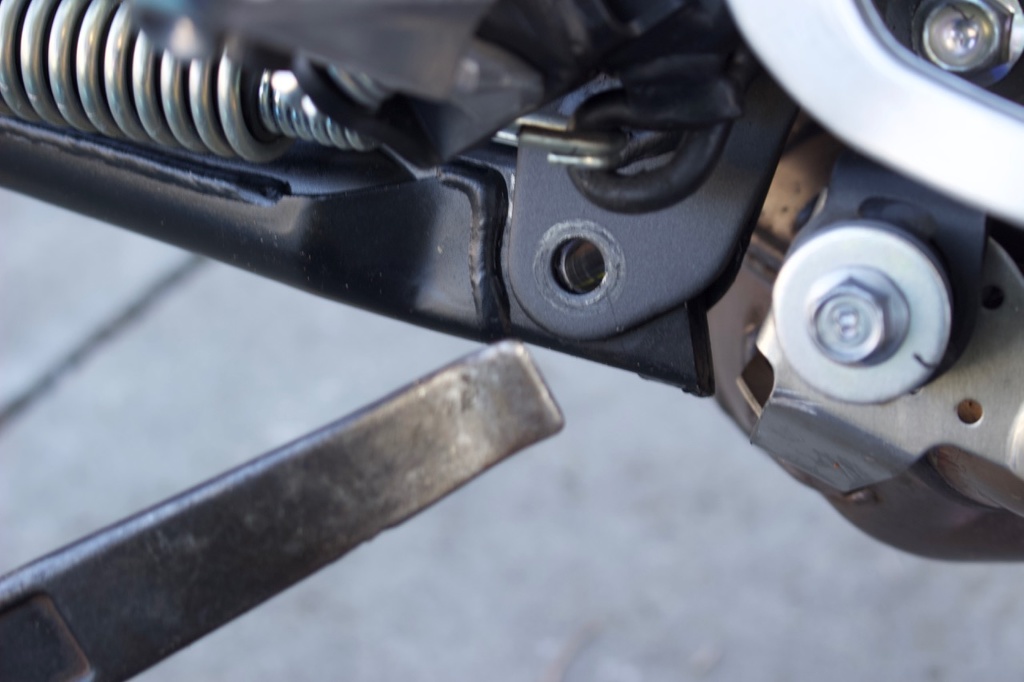
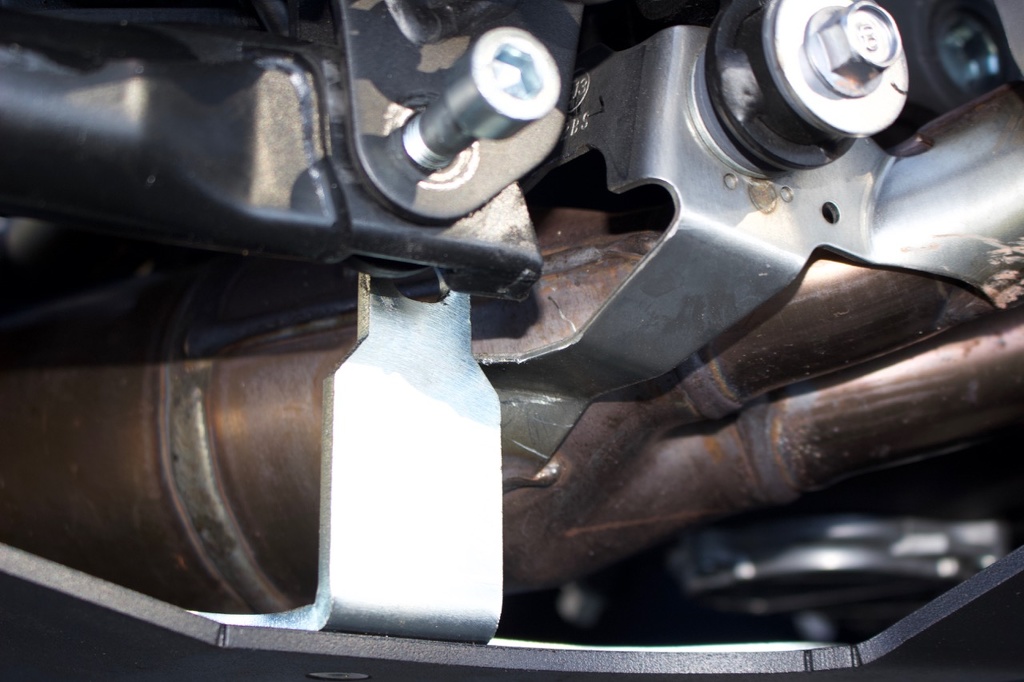
Now work the bolt into the hole from the outside. Once you have made it through put the nut on finger tight. Now move to the other side and repeat the work. I found that I had to loosen the exhaust and let it drop a bit to get room to work with. Don't forget to tighten the exhaust back up when done!
Congratulations. You have now finished the hardest part of the job and you're ready to start getting the skid plate on.
Now I imagine if you have a skid plate you probably also have crash bars. You may have to modify the bars and/or skid plate to make them play together. I chose Altrider crash bars for my pig and will outline the steps here:
First there was a conflict between the crash bars and the skid plate. I had to grind off about 3/16" from the top of the skid plate.
Next the skid plate has spacers that you put in between the skid plate and front engine mount bolts to give proper distance in between it and the crash bars. Some people eliminate those but I felt that it got things a bit too close for comfort. What you need to do is remove 3/16" of material (the thickness of the Altrider crash bar bracket) from the spacers. Since I don't have a mill handy I made due by using two washers on each bolt, one regular hardened Grade 8 washer, one thick hardened Grade 8 washer.
That's it for the modifications, back to the project.
Now you want to take the skid plate and work it into place. I found it easiest to start out with the supplied bolts. While holding the skid plate into place run one bolt through, adding the spacer (or in my case washers) and just start the bolt into the head. Now do the other side. You will curse a bit while doing this, especially if you're also juggling crash bars! Again you only want to start the bolts in place, running them in about four turns.
Now it's time to get the rear bolts in place. You're going to swing the plate up, it will hit the exhaust, and you'll curse that it doesn't fit!
Don't worry. Just give it some pressure and snap it up into place. The skid plate will flex and the bracket on the plate will snap over the exhaust allowing you to remove the nuts from the center stand bolts and bolt it in. Again only go finger tight on the bolts.
Now everything is roughed into place, it's time to start working on the rest of the job.
Using a 10mm Allen run the supplied new front engine bolts in until they're seated but not torqued. Now go back to the center stand bolts and using a 14mm open-ended wrench on the nut (it will *just* fit on the LH side if you position the nut correctly) and an 8mm Allen tighten both center stand bolts to 53 ft-lbs. You may not put the bike on the center stand.
Now you have a decision to make. I find it easiest to replace the engine bolts with studs. This makes future removal/installation of the skid plate alone a lot easier (you still need to remove the stud when pulling crash bars). The trick is that I havne't found hardened studs in that size anywhere, you want an M12-1.25 at about 60-65mm long to ensure adequate bite in the block. I'll come back to this with a source if I find them. If using studs you will remove one bolt and replace it with a stud. Coat the end of the stud with blue LockTite then screw it into the block. Now use a hardened washer and nut to tighten it to 54 ft-lbs.
Now go bash that skid plate against something!
A note on skid plate removal for bike servicing. If you replaced the bolts with studs removal is really easy. Start by putting the bike on the center stand (the collars you installed earlier allow you to do this). With an 8mm Allen and 14mm open ended wrench remove the nuts from the center stand bolts then run the bolts out only so far as to get them past the skid plate bracket. Do not remove the bolts. Now loosen the nuts from your studs, since you applied LockTite the studs should stay in place. Now you can pry the rear edge of the skid plate to spring it past the exhaust causing the skid plate to hang from the studs. Now remove the nuts and slide the skid plate out from the bike. To re-install simply hang the skid plate on the studs, start the nuts off, slip the rear bracket into place, and install the center stand bolts (tightening to 53 ft-lbs), now go back up front and tighten the nuts to 54 ft-lbs.
I've done a few oil changes with the skid plate and don't really mind it being there.
So you bought a nice new ACD skid plate and want it on the bike, eh? Well this this is *massive,* isn't it.
The installation is pretty straight forward with just a few gotchas to keep an eye on.
The first thing you'll do is set the bike up on the side stand. Now using a 17mm socket remove the two lower engine mount bolts (the two big guys right above the header).
With that out of the way you need to get to work on the center stand bolts.
Start by removing one side first. Using a 14mm socket remove the center stand nut on the outside of the frame.
Now carefully knock out the stepped bolt.
Note that once the bolt comes out your center stand is going to shift because of the spring pressure. This is normal.
Now you want to insert the supplied spacer. Grease the spacer and insert it from the inside with the collar facing inside. You will need to wrestle with your center stand to do this, I found that it was easiest to have a pry bar (I used a steel tire iron) to pry against the center stand until the holes were visually lined up and work it in. Work the spacer in until the collar meets the inside of the frame with the inner lip of the collar is flush with the outer frame spur.
Now work the bolt into the hole from the outside. Once you have made it through put the nut on finger tight. Now move to the other side and repeat the work. I found that I had to loosen the exhaust and let it drop a bit to get room to work with. Don't forget to tighten the exhaust back up when done!
Congratulations. You have now finished the hardest part of the job and you're ready to start getting the skid plate on.
Now I imagine if you have a skid plate you probably also have crash bars. You may have to modify the bars and/or skid plate to make them play together. I chose Altrider crash bars for my pig and will outline the steps here:
First there was a conflict between the crash bars and the skid plate. I had to grind off about 3/16" from the top of the skid plate.
Next the skid plate has spacers that you put in between the skid plate and front engine mount bolts to give proper distance in between it and the crash bars. Some people eliminate those but I felt that it got things a bit too close for comfort. What you need to do is remove 3/16" of material (the thickness of the Altrider crash bar bracket) from the spacers. Since I don't have a mill handy I made due by using two washers on each bolt, one regular hardened Grade 8 washer, one thick hardened Grade 8 washer.
That's it for the modifications, back to the project.
Now you want to take the skid plate and work it into place. I found it easiest to start out with the supplied bolts. While holding the skid plate into place run one bolt through, adding the spacer (or in my case washers) and just start the bolt into the head. Now do the other side. You will curse a bit while doing this, especially if you're also juggling crash bars! Again you only want to start the bolts in place, running them in about four turns.
Now it's time to get the rear bolts in place. You're going to swing the plate up, it will hit the exhaust, and you'll curse that it doesn't fit!
Don't worry. Just give it some pressure and snap it up into place. The skid plate will flex and the bracket on the plate will snap over the exhaust allowing you to remove the nuts from the center stand bolts and bolt it in. Again only go finger tight on the bolts.
Now everything is roughed into place, it's time to start working on the rest of the job.
Using a 10mm Allen run the supplied new front engine bolts in until they're seated but not torqued. Now go back to the center stand bolts and using a 14mm open-ended wrench on the nut (it will *just* fit on the LH side if you position the nut correctly) and an 8mm Allen tighten both center stand bolts to 53 ft-lbs. You may not put the bike on the center stand.
Now you have a decision to make. I find it easiest to replace the engine bolts with studs. This makes future removal/installation of the skid plate alone a lot easier (you still need to remove the stud when pulling crash bars). The trick is that I havne't found hardened studs in that size anywhere, you want an M12-1.25 at about 60-65mm long to ensure adequate bite in the block. I'll come back to this with a source if I find them. If using studs you will remove one bolt and replace it with a stud. Coat the end of the stud with blue LockTite then screw it into the block. Now use a hardened washer and nut to tighten it to 54 ft-lbs.
Now go bash that skid plate against something!
A note on skid plate removal for bike servicing. If you replaced the bolts with studs removal is really easy. Start by putting the bike on the center stand (the collars you installed earlier allow you to do this). With an 8mm Allen and 14mm open ended wrench remove the nuts from the center stand bolts then run the bolts out only so far as to get them past the skid plate bracket. Do not remove the bolts. Now loosen the nuts from your studs, since you applied LockTite the studs should stay in place. Now you can pry the rear edge of the skid plate to spring it past the exhaust causing the skid plate to hang from the studs. Now remove the nuts and slide the skid plate out from the bike. To re-install simply hang the skid plate on the studs, start the nuts off, slip the rear bracket into place, and install the center stand bolts (tightening to 53 ft-lbs), now go back up front and tighten the nuts to 54 ft-lbs.
I've done a few oil changes with the skid plate and don't really mind it being there.