Ossaboy2867
Active Member
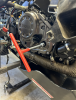
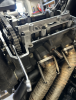
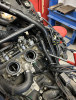
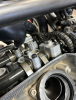
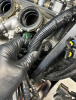
I’ve never had a problem with any cam chain tensioner, but with 100,000kms on my gen 2 version and forum talk of them failing I decided to replace it with a new gen 3. I now have 170,000 on the gen 3 and decided to go with a Graves manual because my engine sounds quite ‘rattly’ compared to my recently acquired T12 with one third the kms. Replaced the cam chain too. Not sure how to adjust it yet, I have it loose enough that I can move the chain guide a bit by hand, I expect I will gradually tighten it until (hopefully) the rattle disappears.
The previous owner of my second bike proudly stated nothing has ever been done the engine, no valve check in 9 years and 100,000 kms and still original gen 2 tensioner…… and it runs great. I’m torn between just riding it or do a full service of valve check, update the tensioner, spark plugs, etc.
LonghaulPaul told me his first T12 never had a valve check in 200,000 miles but he did install a manual tensioner, just turned it in a bit at each oil change until it ran out of adjustment!
I have read of gen3 tensioner failing, someone on this forum entered the iron butt rally a few years ago with a new T12 and the engine grenaded due to the tensioner failing. Yamaha fixed it under warranty and he sold the bike.
Thanks for the info. I ordered the Gen 3 model tensioner anyways to see what changes they made to it. I wish there was a way to "set" the tensioner to a known value instead of sound. I think the easiest and cheapest way to kind of check the manual tensioner is to lay the bike on its side and pull the clutch cover. You can see pretty far up into the engine that way and the gasket is cheap.
I know it is not recommended to tighten a manual cam chain tensioner when the engine is hot, but the auto tensioner does exactly that. Which this makes me wonder if that's why they "fail". Is it the chain that's actually failing? How did Yamaha come to this conclusion? Maybe every 40k I should replace the chain, shoes and tensioner as a set? I find it interesting that the chain is the same link size/pitch as some 125 and 250 air cooled 4 strokes with one cam. Once the engine grenades how does one without any doubt point to the tensioner as the failure point?
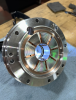
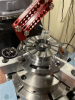
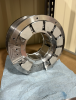
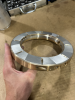
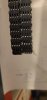
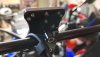
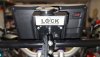
Im sure all of this has been beaten to death on here but at least it's more technical than an engine oil rant or what tires you run. I am a fairly competent mechanic I think and I am always looking for more knowledge about the mechanics and inner workings of engines such as this. And with the camshafts essentially rotating and relying on a thin film of pressurized oil for support I am genuinely interested in the fine details since that's my career, machining and designing custom babbitt bearings that float on pressurized oil! And with that, here are some of those cool bearings that are machined from scratch. I hope the mods don't get mad for posting them here, but it is sort of on the topic
")