Rob, this may sound a challenge if it’s new to you, honestly it’s not, it’s straightforward. Allow an hour to 90 mins as a first attempt. Note - this is the method I use, it’s your choice to follow this or not. If we lived nearer to each other I’d go through it with you.
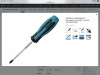
Tools/Equipment- JIS screwdriver for master cylinder.
8mm ring spanner for bleed nipple.
2ft length of clear hose, that fits snugly over the bleed nipple.
Paper Towels.
WD40.
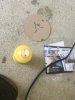
2 litres of DOT4 brake fluid (2x1).
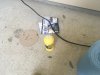
Empty jar. I use an old coffee jar with a hose diameter hole drilled in the lid.
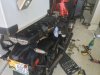
Bike on centre stand, front wheel needs to be fitted as if ready to ride. Activate ABS pump using forum method. Remember, brake fluid WILL damage paintwork if spilled on it.
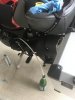
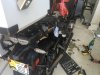
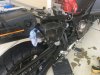
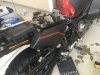
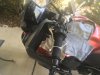
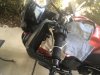
Cover tank directly below the master cylinder with paper towel and place paper towel around underneath of master cylinder (MC). NOTE - when the lid is off of the master cylinder, fluid will squirt upwards when you pull the brake lever.
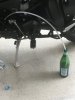
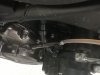
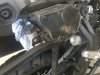
I always start on the nearest side to the brake lever, so that’s how I’ll proceed. 8mm ring over bleed nipple, making sure spanner is located to allow half a turn to loosen. Place hose securely over nipple. Crack loose the nipple and immediately just nip back up (not retighten), just nip. Put an inch or two of brake fluid in the jar and sink other end of hose into the fluid.
Move steering into a position where the MC is level, this ensures no spillage if full up. Remove lid carefully and place somewhere flat, lid down. Fold a few bits of kitchen towel to MC lid size pieces as this will stop fluid squirting upwards and onto bike parts. Position yourself so that you can work on the caliper and the lever at the same time. Top up the MC with brake fluid and place the paper towel as a lid, pump lever a couple of times and hold lever in a braked position, loosen the nipple and the lever will go to the bar and fluid will flow into the tube. Keep lever at the bar and nip up the nipple. Pump lever until solid again and hold in a solid position, loosen nipple and let lever sink to the bar, keep there and nip up nipple, repeat again about 10-12 times. Check fluid level in MC regularly, DO NOT allow to run dry. Repeat on other caliper, noting that you might need a helper as the lever and nipple are further apart.
Nip up nipples and replace MC lid. Reactivate the ABS pump and repeat the whole process. To finish off, top up brake fluid, but don’t overfill. Clean lid and it’s parts, replace and tighten. Tighten nipples, but don’t overdo it, stripping these would be a nightmare. Manual says 5NM. Please check yourself.
Clean around MC and nipples with towel. I always put WD40 on the towel first. Ensure you have no spilt fluid on/around/below MC. Ensure you have a brake lever with good feel.
Done!