GSequoia
Active Member
Hello all,
Back in February of 2019 I bought a very low mile 2019 Super Tenere halfway on impulse. I had been meaning to pick up a big Adv bike to supplement my 1990 DR350 for some time and a deal came up at the right time for me. The bike was shiny, had clearly hardly left the garage, and had just 2900 miles on it. Of course that would not do.
I armored it, played with the electrical system, and had it in the dirt at the 2019 Death Valley Noobs Rally inside of a month. I'm finally now getting to sharing my electrical modifications with the group.
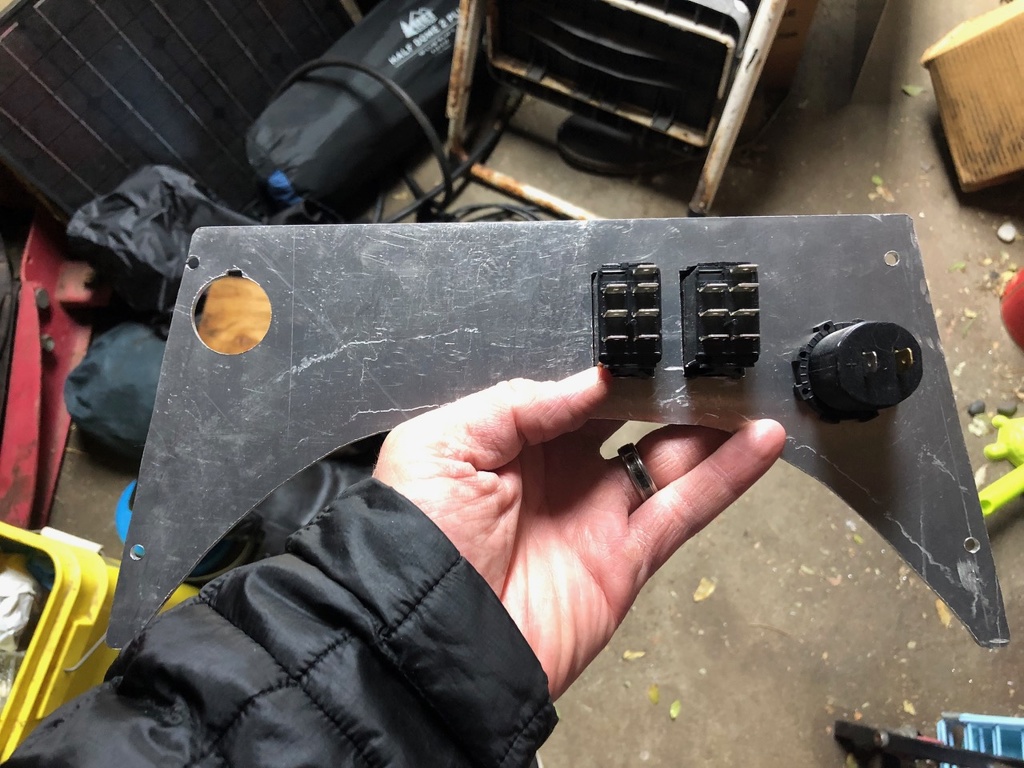
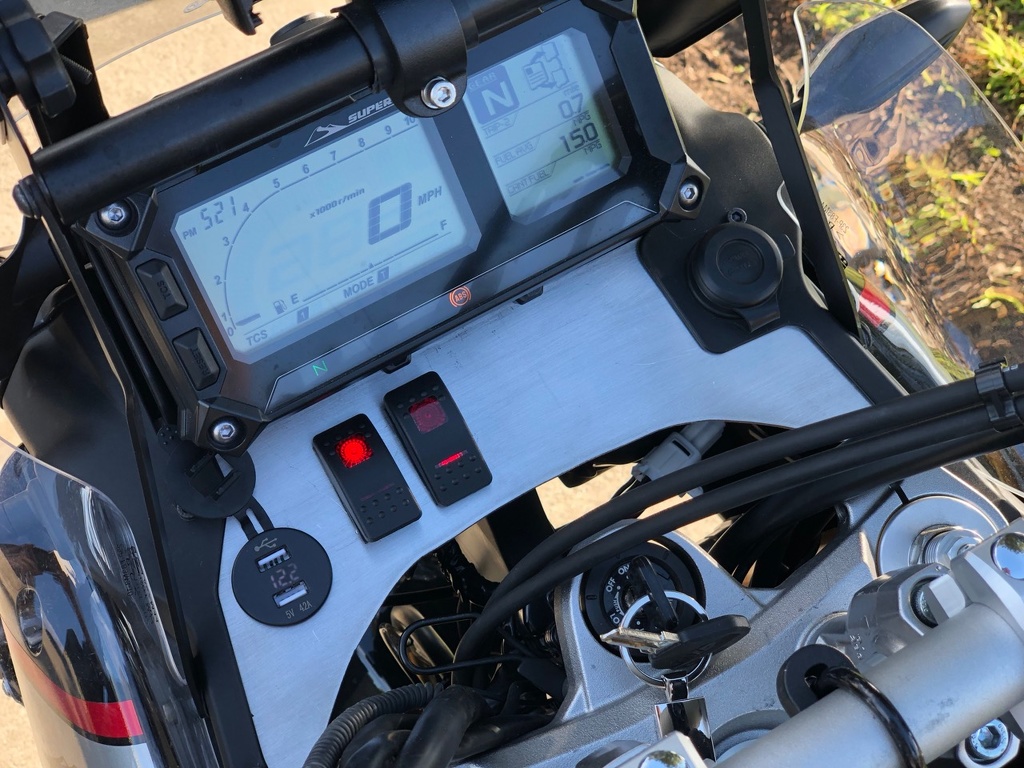
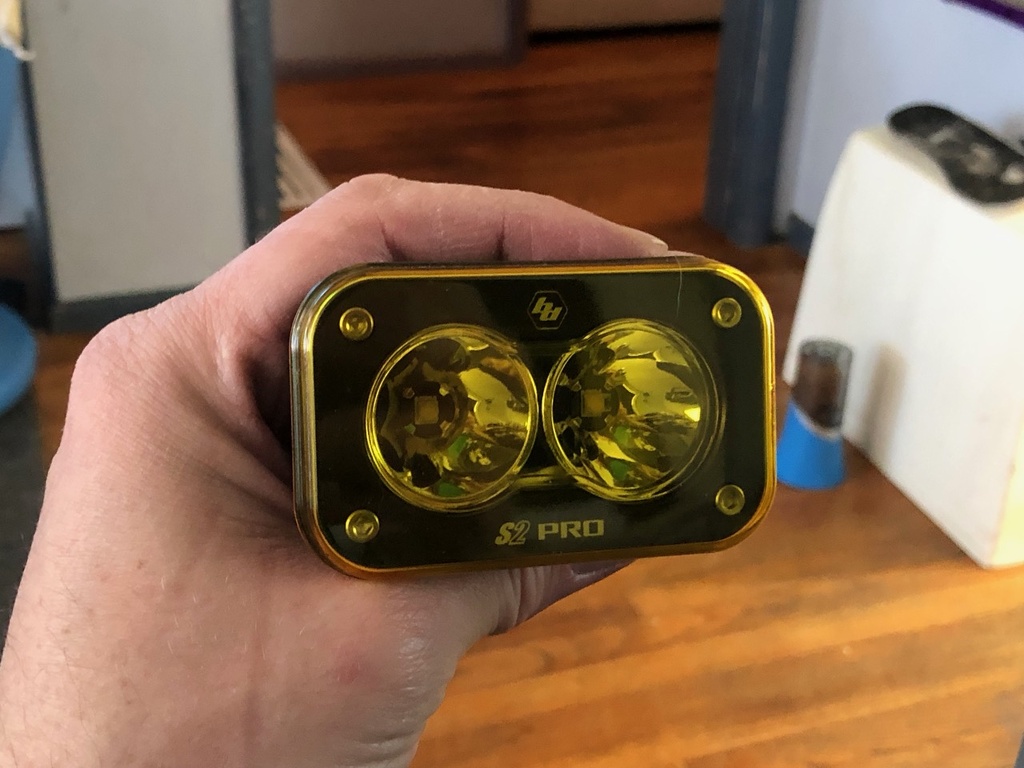
My goals here were to provide neat wiring using OEM-style connectors, supply circuits for dedicated USB charging (in addition to the OEM low wattage cig lighter outlet), provide a circuit for an amateur radio, install my Baja Designs S2 pro spot lamps, and wire in a plug for my MicroStart in case I screw up and kill the battery. All of these goals would be accomplished in a completely reversible fashion in case I decide to sell the bike down the road (fat chance).
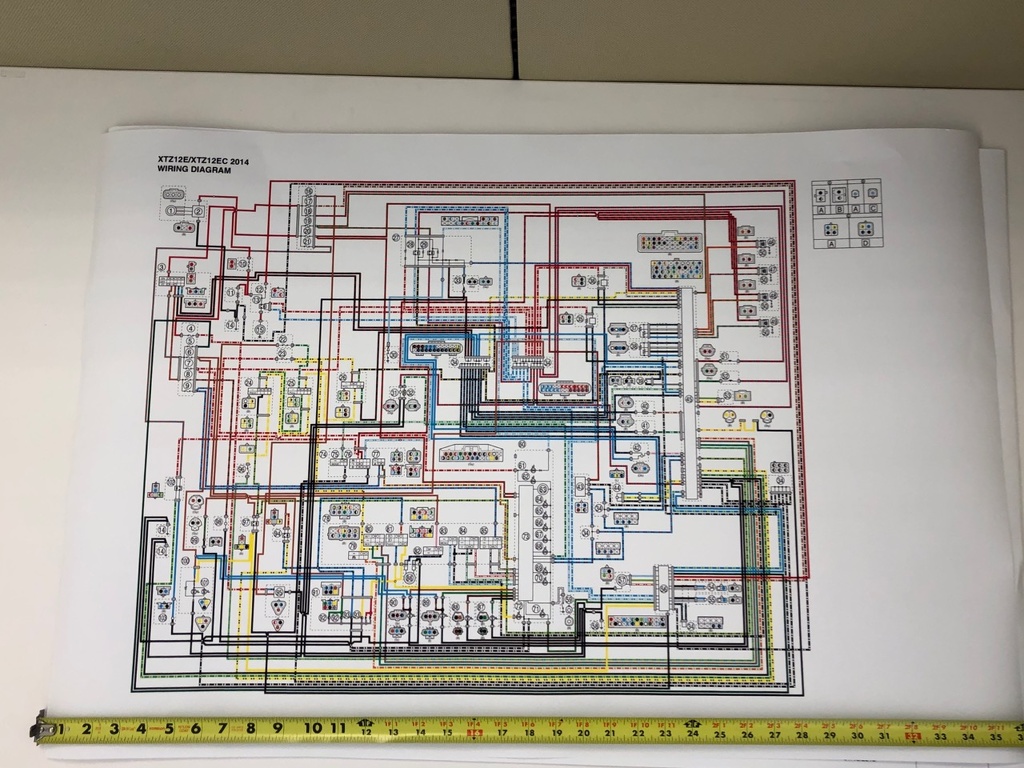
As with any well-executed project the first step is research. Luckily running IT for a commercial real estate firm gives me free access to a large format printer so I grabbed the wiring diagram images from the service manual and printed them out.
Next because what you see on paper doesn't always match reality it was time to dig into my new bike.
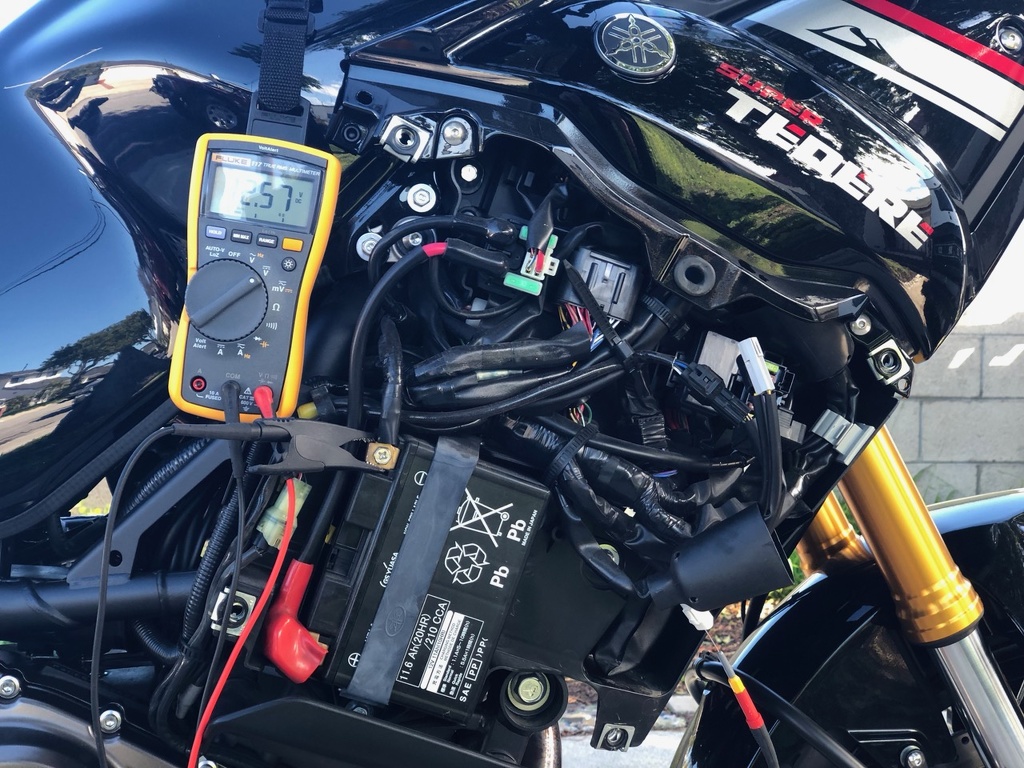
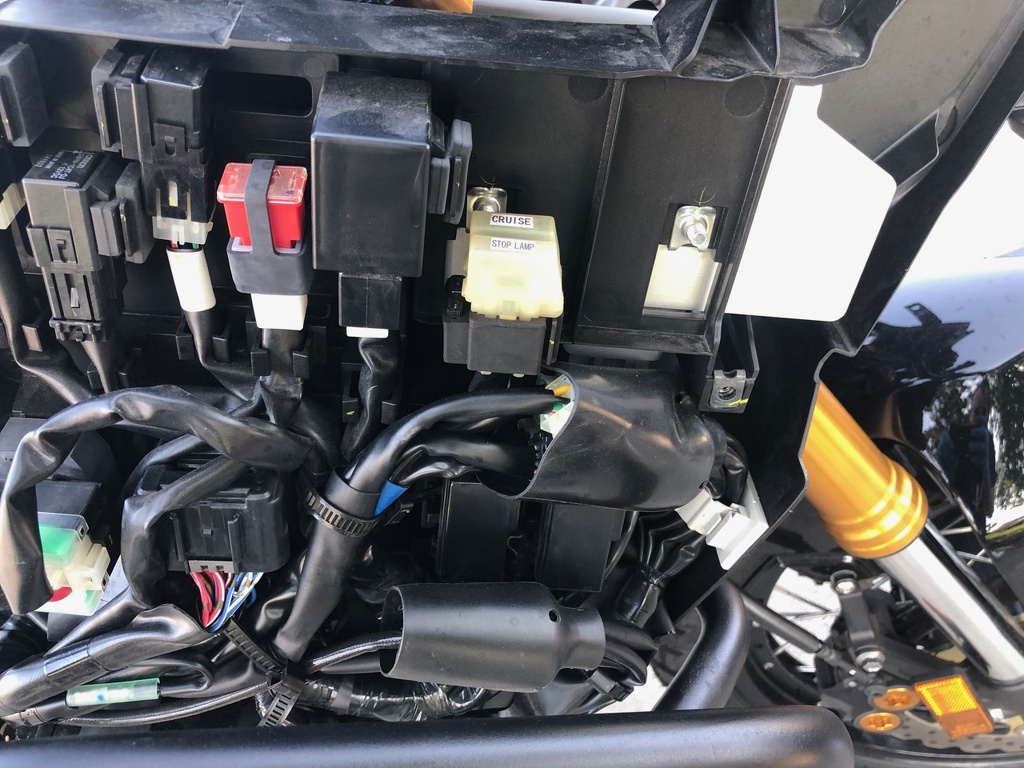
Behind the RH cowling lies the heart of the bike's brains and volts.
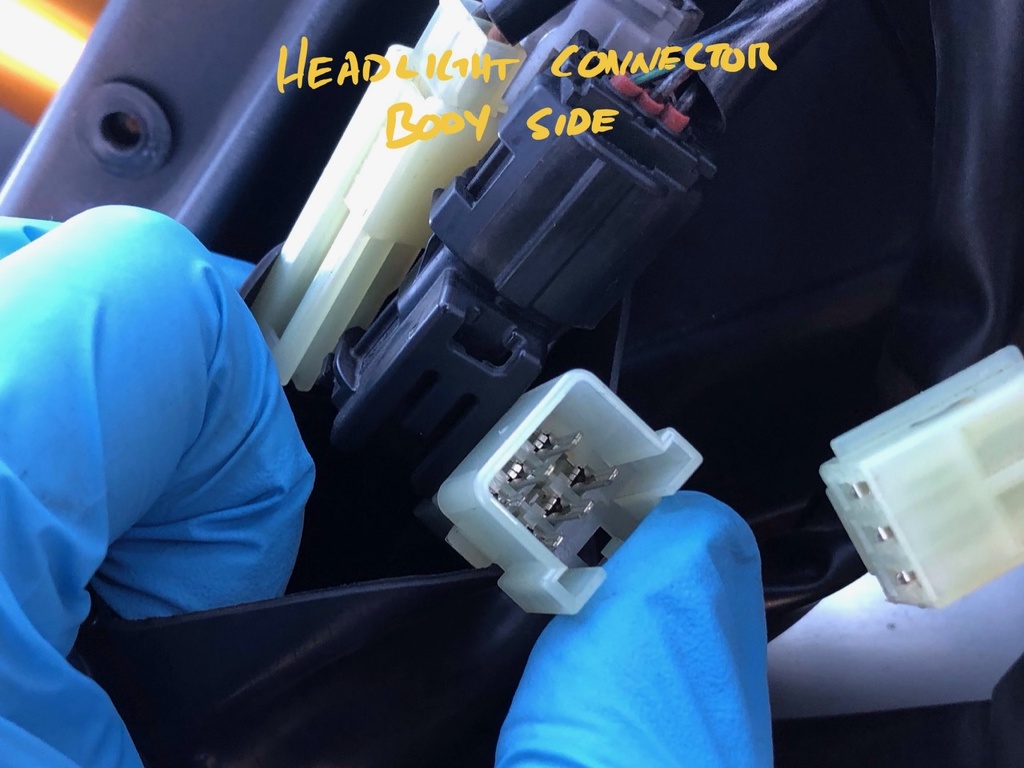
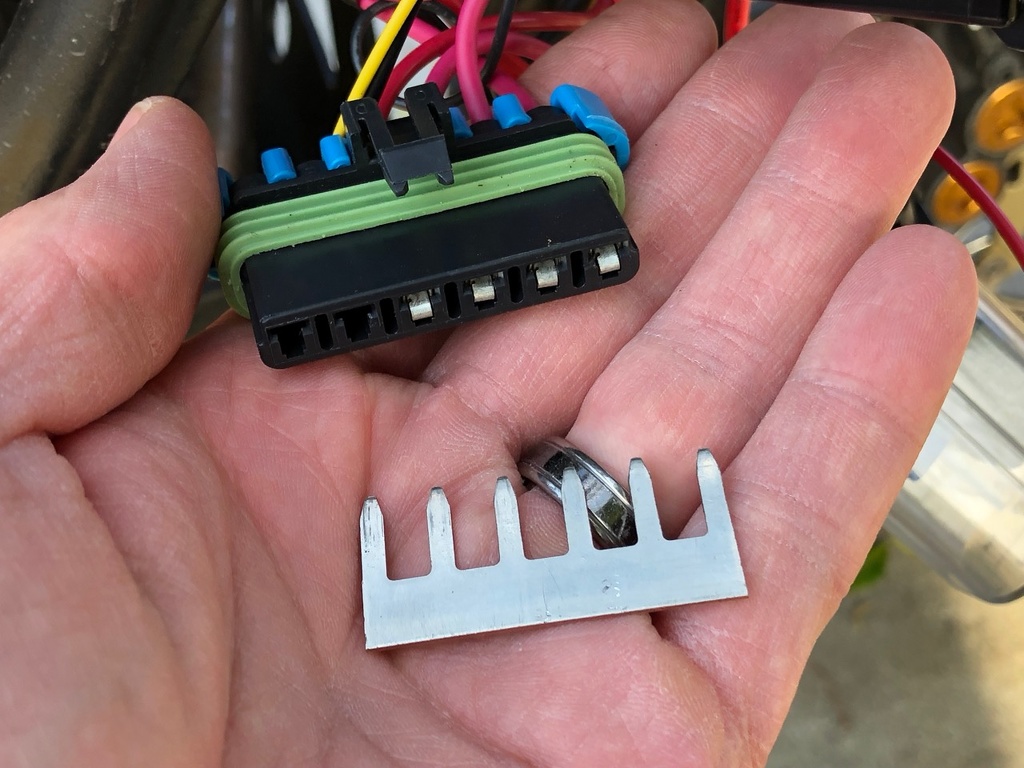
Buried under the loom you will find these two capped connectors. The four pin connector on the left is to be ignored. The three pin connector on the right is the factory accessory light wiring loom and where the meat of this project will start.
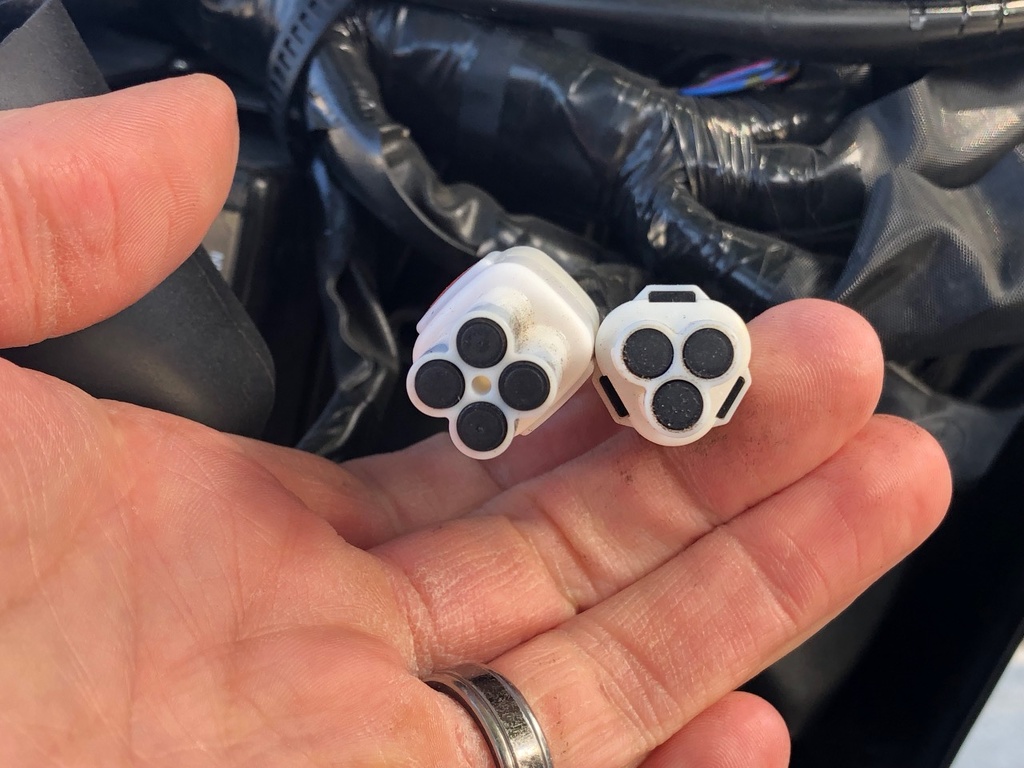
This connector pinout is as follows:
Black: Ground
Blue with Black: Constant +12VDC on dedicated 20A circuit
Brown: Ignition Power feed unknown capacity (used for relay trigger)
The next part of the investigation has to do with my spot lamps. I like to run spot lamps on a double throw switch (on - off - on). This gives me the option of having one side deliver light at all times and the other side be my auto side where it is tied to the operation of the high beam.
The Super Tenere has single filament bulbs. High/low is operated by a physical gate inside the headlamp housing that blocks off light. This gate it controlled by a solenoid (that is the click you hear when you flip from low to high). My first plan was to grab a trigger wire from the high beam switch for the spot lamp relay. This did not work as the high beam on and the flash to pass wires are electrically isolated so I had to go hunting.
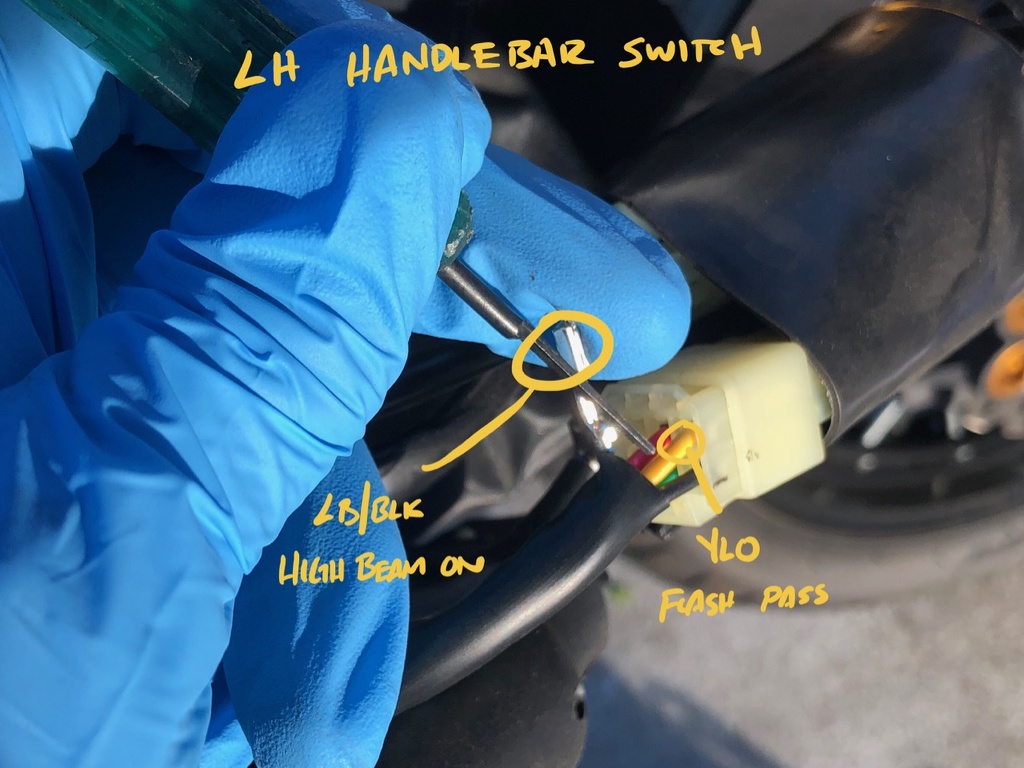
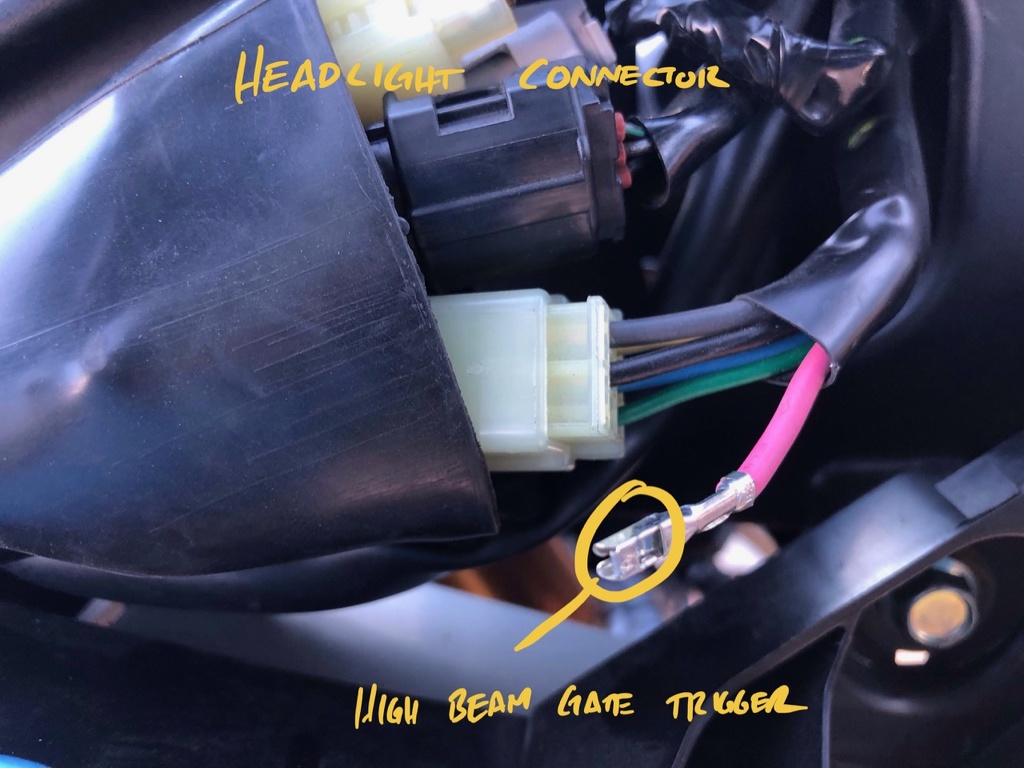
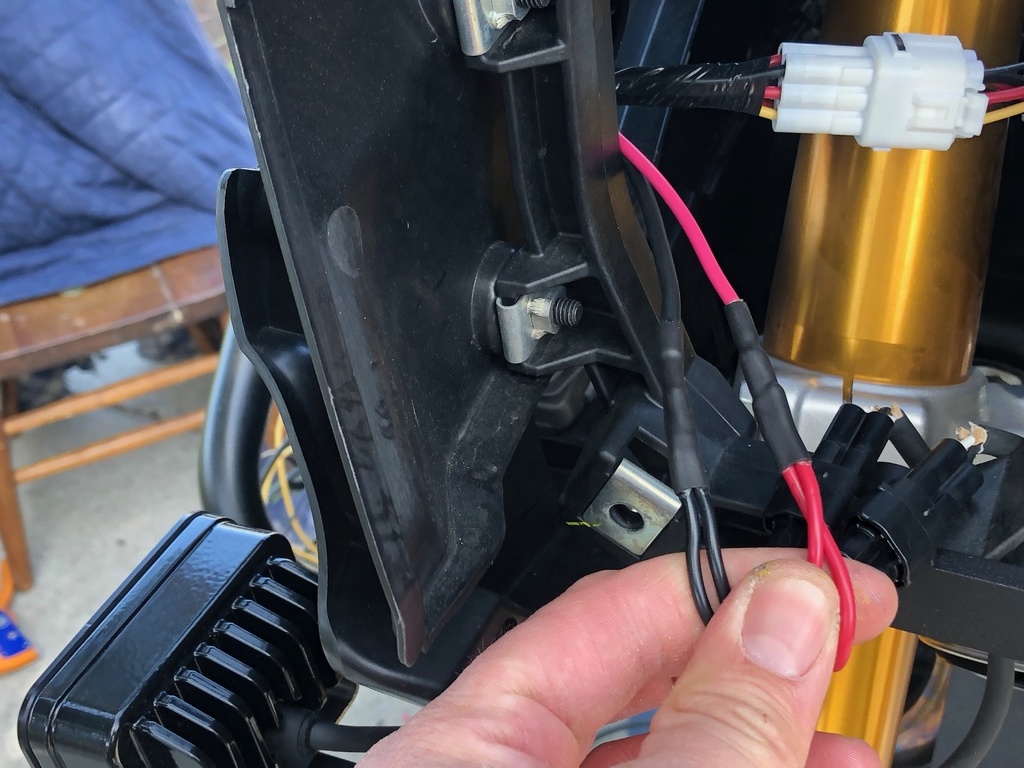
My solution was to find the wire in the loom that operates the solenoid for the high beam gate. This is located in the look on the right side of the stem.
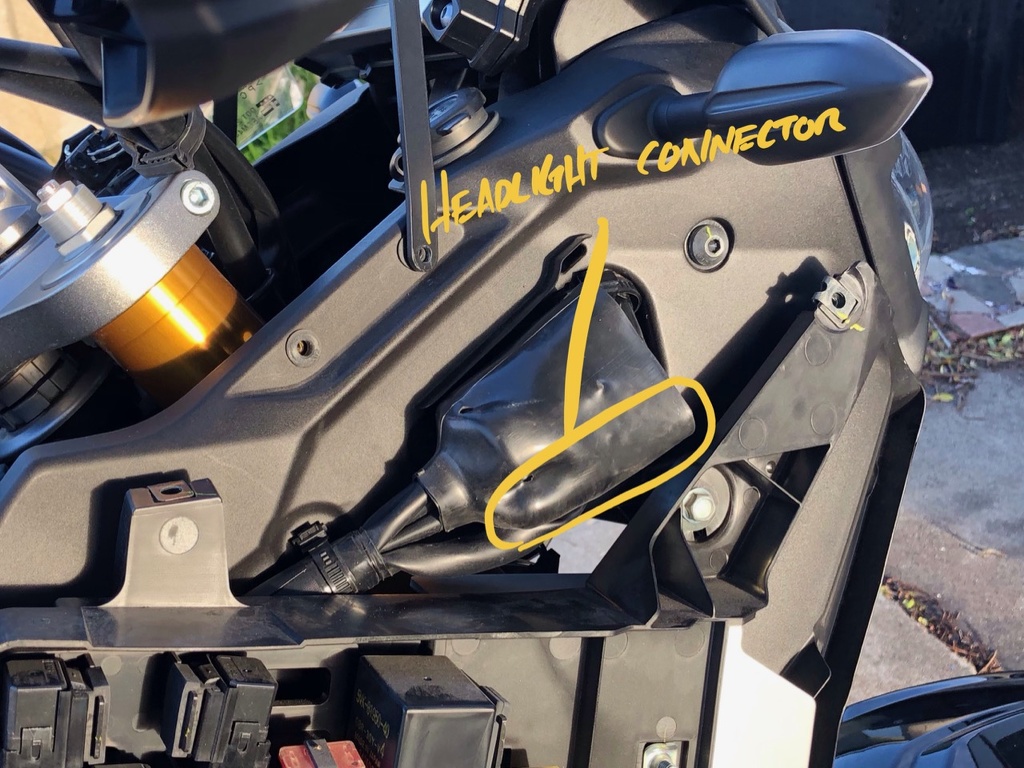
The red wire from the side of the connector toward the front of the bike leads directly to the solenoid. This is the wire that I will intercept for my spot lamps.

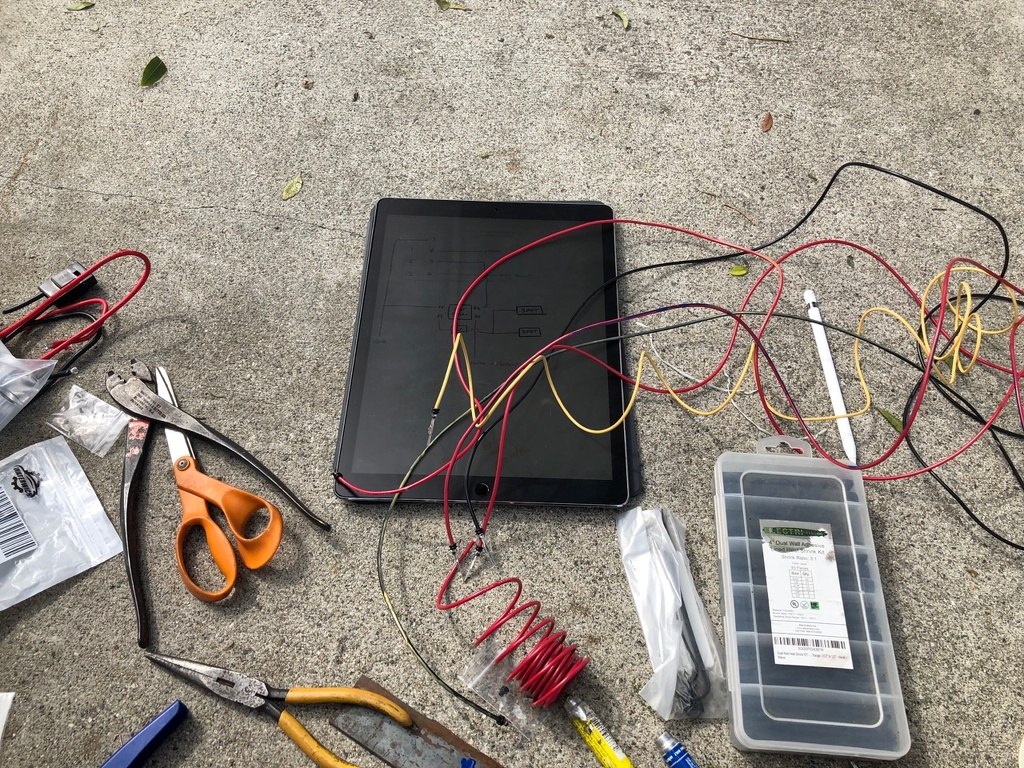
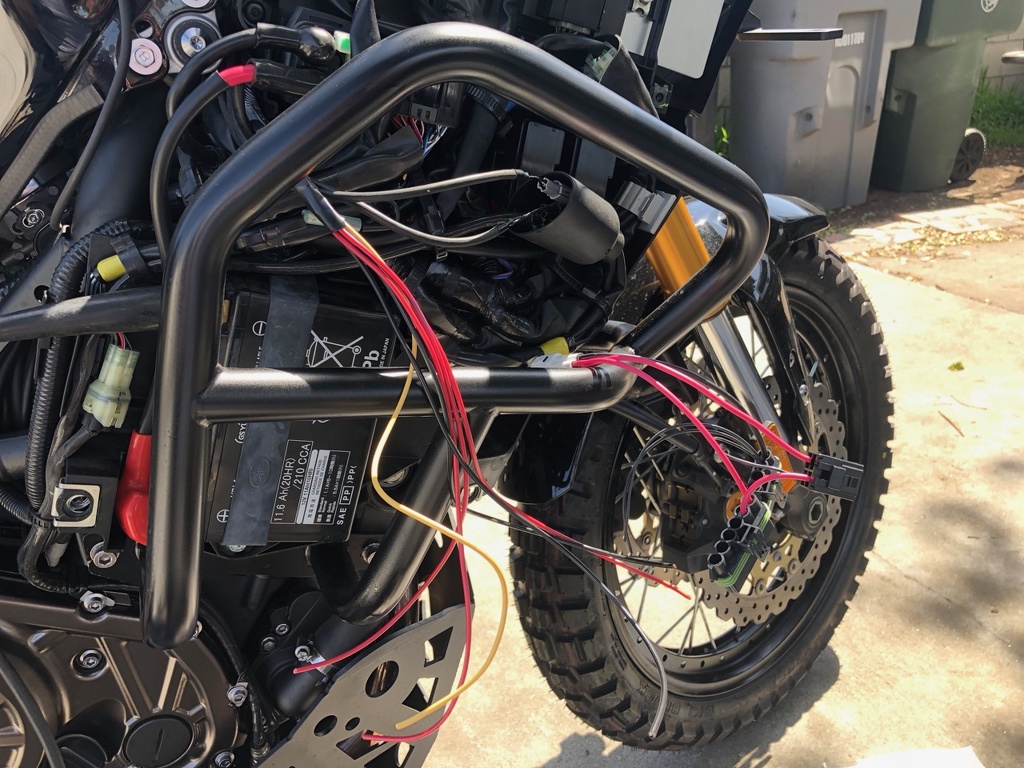
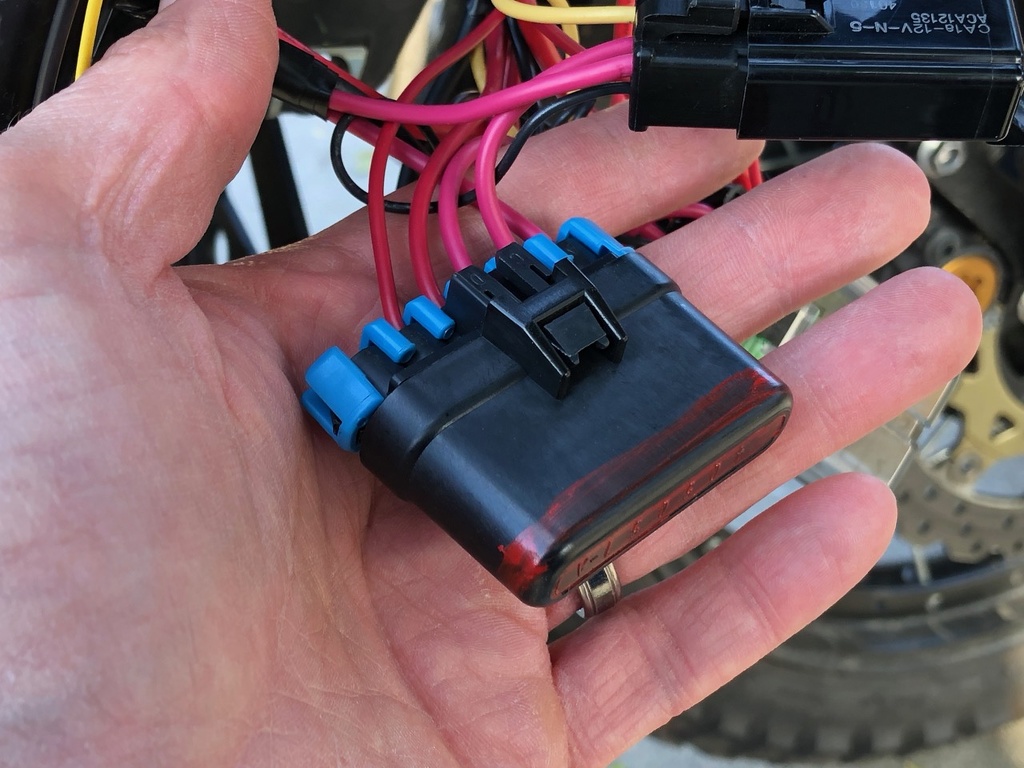
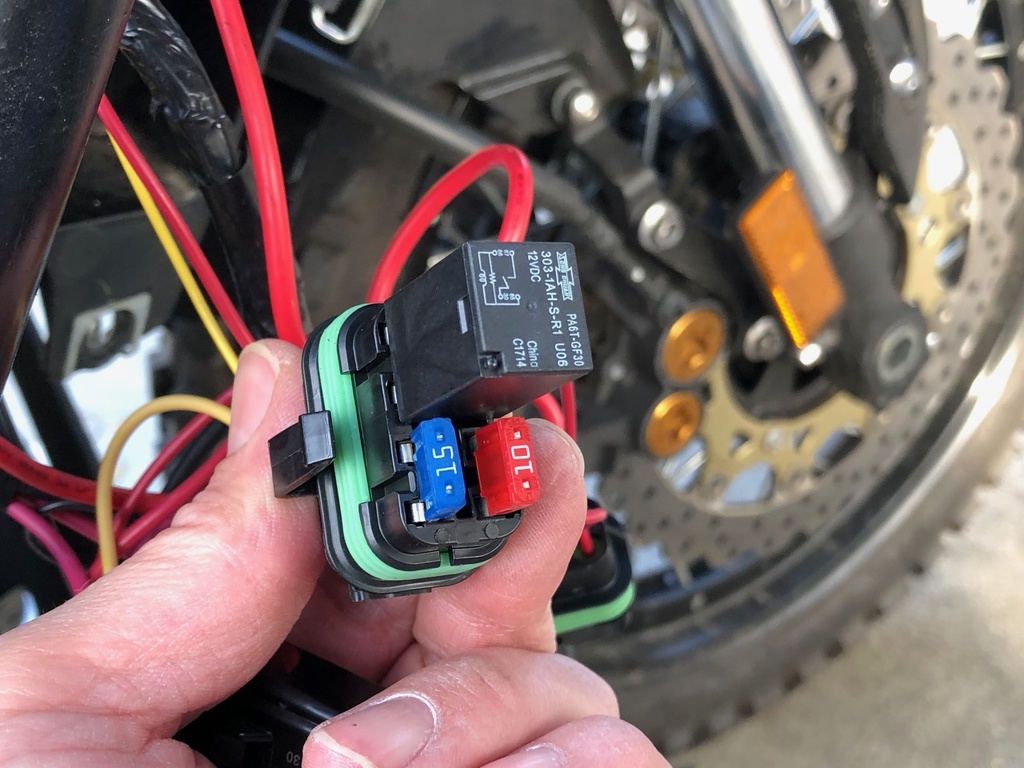
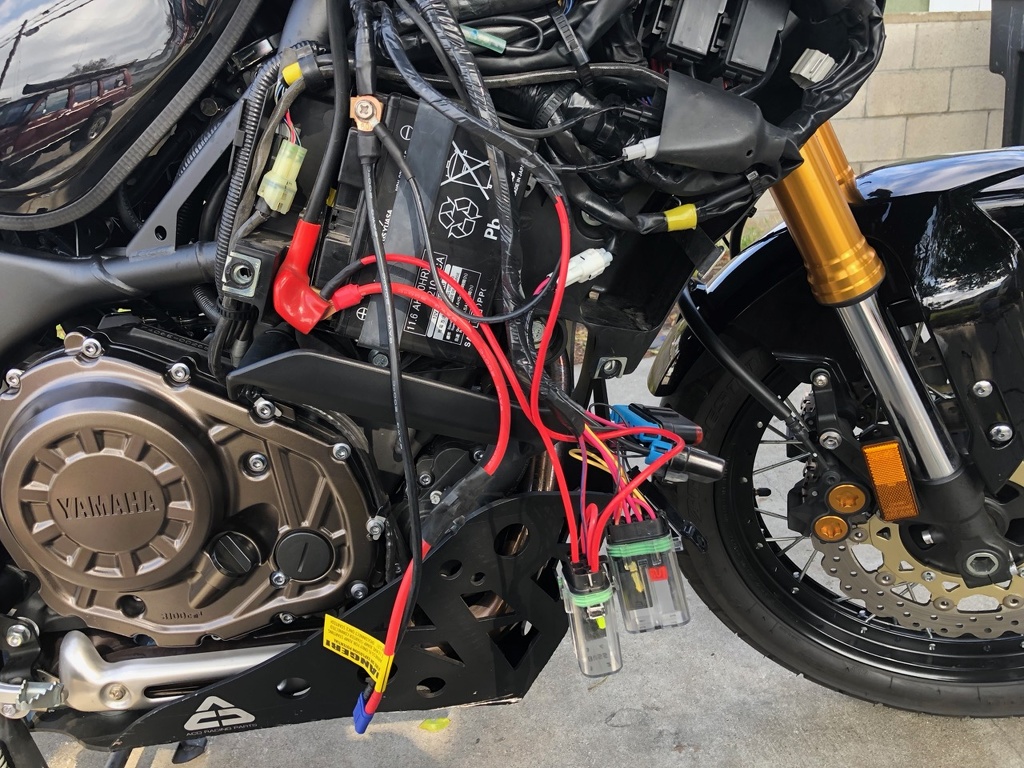
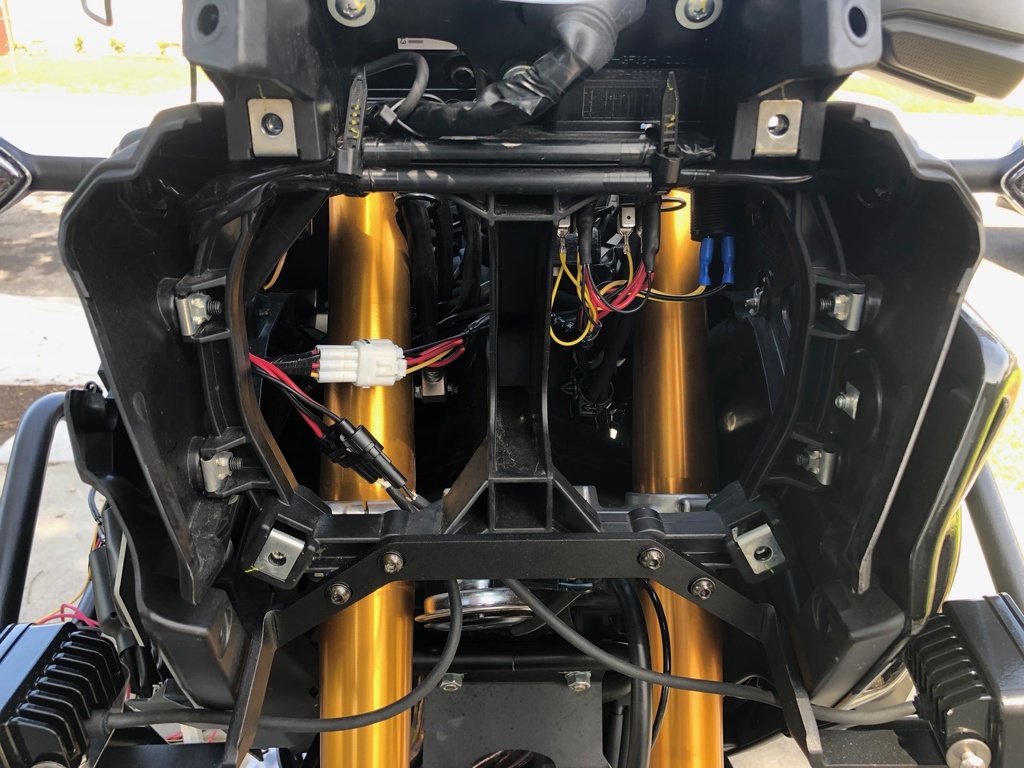
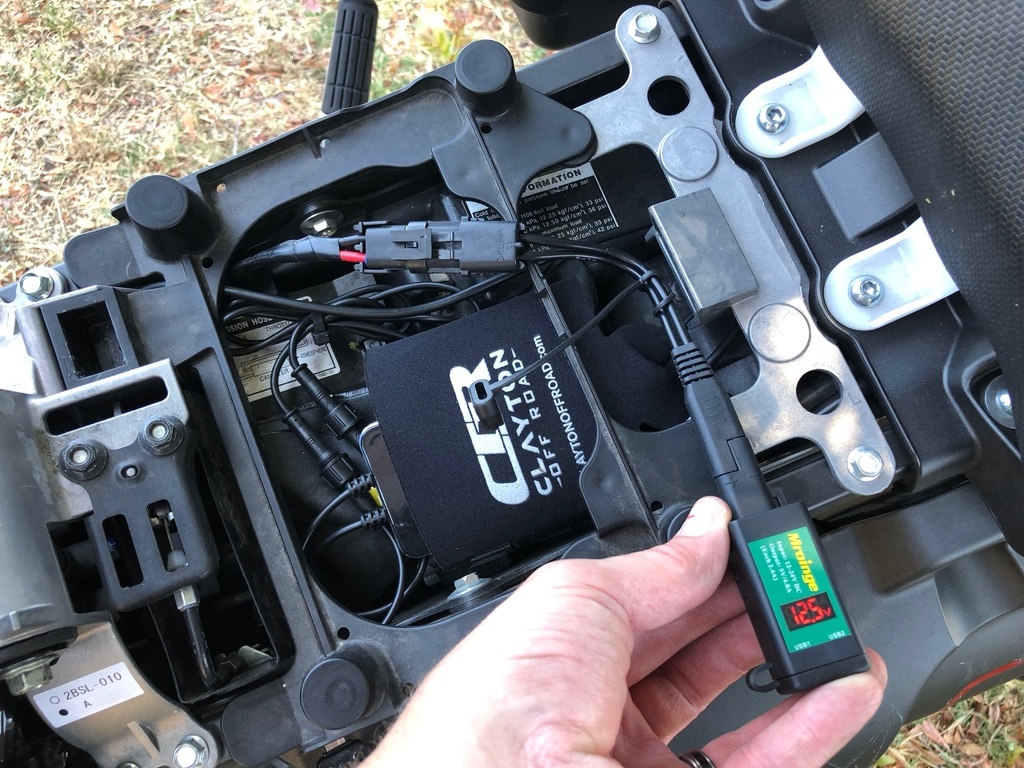
Suffice to say I really had to tear into the bike to plan everything out. For the curious here are a couple photos:
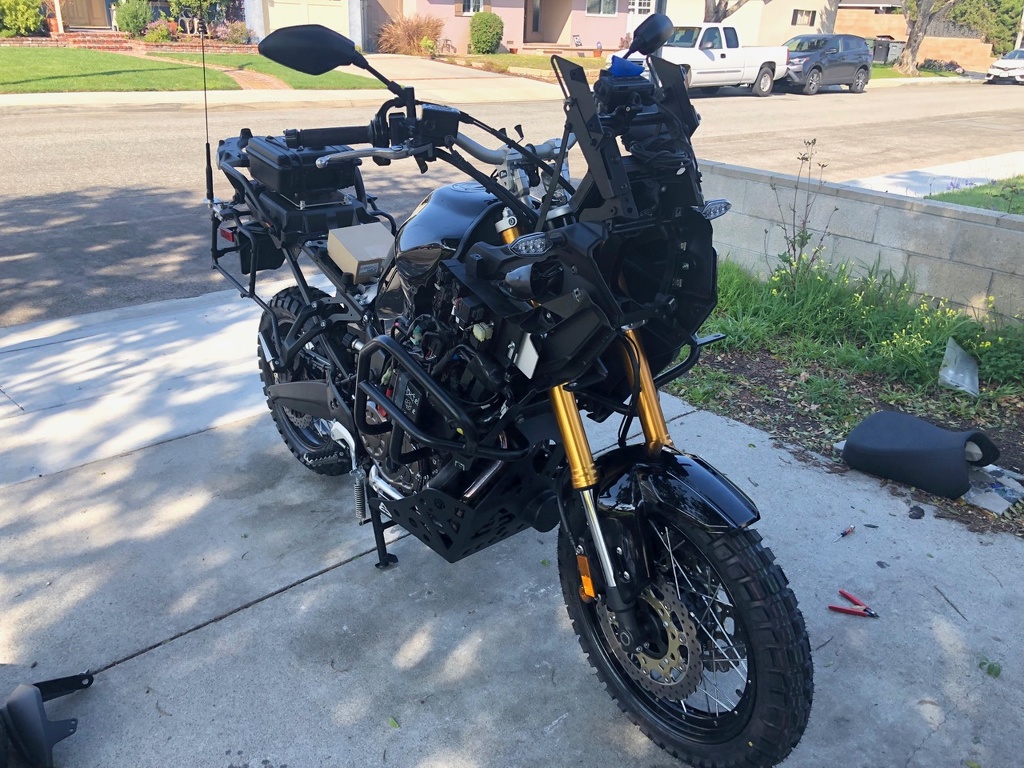
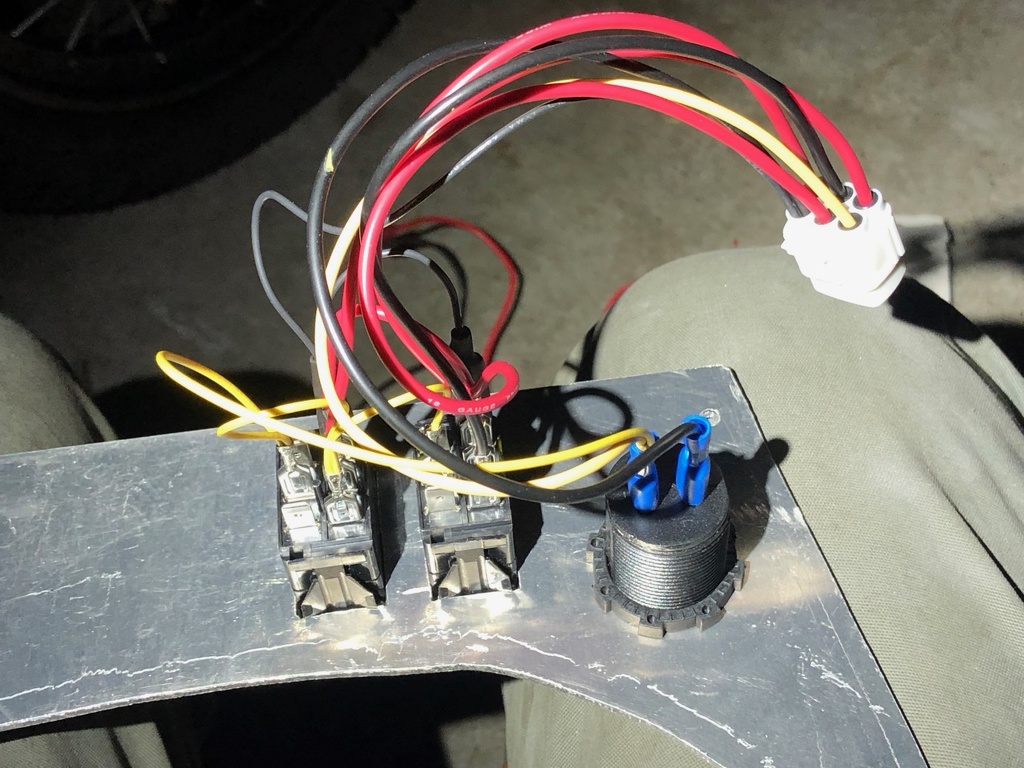
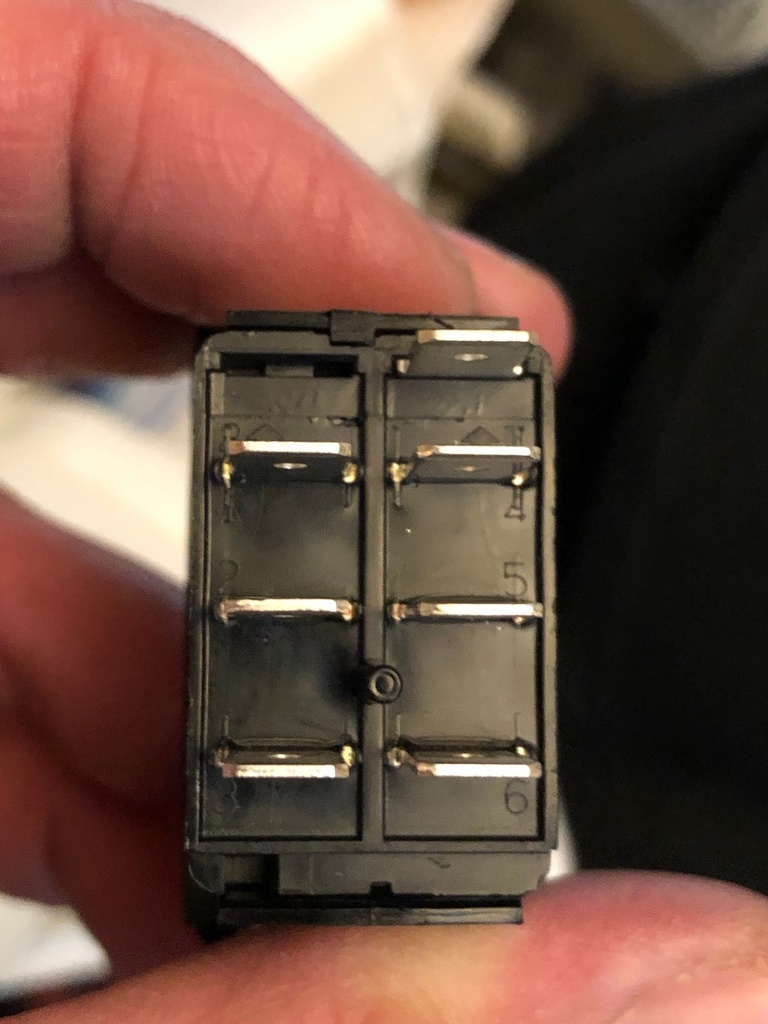
Now that the investigative work is done it was time to start planning and executing the project. Lots of boring stuff drawing shitty electrical diagrams on my iPad, researching the proper connectors, and trying to think of any additional items I might want to add down the line (no provision for heated gear at this time, SoCal, baby!).
Back in February of 2019 I bought a very low mile 2019 Super Tenere halfway on impulse. I had been meaning to pick up a big Adv bike to supplement my 1990 DR350 for some time and a deal came up at the right time for me. The bike was shiny, had clearly hardly left the garage, and had just 2900 miles on it. Of course that would not do.
I armored it, played with the electrical system, and had it in the dirt at the 2019 Death Valley Noobs Rally inside of a month. I'm finally now getting to sharing my electrical modifications with the group.
My goals here were to provide neat wiring using OEM-style connectors, supply circuits for dedicated USB charging (in addition to the OEM low wattage cig lighter outlet), provide a circuit for an amateur radio, install my Baja Designs S2 pro spot lamps, and wire in a plug for my MicroStart in case I screw up and kill the battery. All of these goals would be accomplished in a completely reversible fashion in case I decide to sell the bike down the road (fat chance).
As with any well-executed project the first step is research. Luckily running IT for a commercial real estate firm gives me free access to a large format printer so I grabbed the wiring diagram images from the service manual and printed them out.
Next because what you see on paper doesn't always match reality it was time to dig into my new bike.
Behind the RH cowling lies the heart of the bike's brains and volts.
Buried under the loom you will find these two capped connectors. The four pin connector on the left is to be ignored. The three pin connector on the right is the factory accessory light wiring loom and where the meat of this project will start.
This connector pinout is as follows:
Black: Ground
Blue with Black: Constant +12VDC on dedicated 20A circuit
Brown: Ignition Power feed unknown capacity (used for relay trigger)
The next part of the investigation has to do with my spot lamps. I like to run spot lamps on a double throw switch (on - off - on). This gives me the option of having one side deliver light at all times and the other side be my auto side where it is tied to the operation of the high beam.
The Super Tenere has single filament bulbs. High/low is operated by a physical gate inside the headlamp housing that blocks off light. This gate it controlled by a solenoid (that is the click you hear when you flip from low to high). My first plan was to grab a trigger wire from the high beam switch for the spot lamp relay. This did not work as the high beam on and the flash to pass wires are electrically isolated so I had to go hunting.
My solution was to find the wire in the loom that operates the solenoid for the high beam gate. This is located in the look on the right side of the stem.
The red wire from the side of the connector toward the front of the bike leads directly to the solenoid. This is the wire that I will intercept for my spot lamps.
Suffice to say I really had to tear into the bike to plan everything out. For the curious here are a couple photos:
Now that the investigative work is done it was time to start planning and executing the project. Lots of boring stuff drawing shitty electrical diagrams on my iPad, researching the proper connectors, and trying to think of any additional items I might want to add down the line (no provision for heated gear at this time, SoCal, baby!).


 .
.