GSequoia
Active Member
Those of you that know me know that I'm the radio guy for the Death Valley Noobs Rally. While I have this reputation as a ham radio guy I'm really quite terrible at it. I only use my radios directly with my outdoor activities. I hardly ever sit in a basement in stained underwear talking down to people on the airwaves. Pathetic, I know.
Anyway one of the goals with the big bike was to get a big, full sized radio on it. We have a lot more electrical capacity on these beasts to handle the radio and while a full, sustained 20A draw may ultimately overwhelm the charging system (causing the battery to drain) I transmit briefly. When you're receiving the draw is minimal so you can monitor all day long.
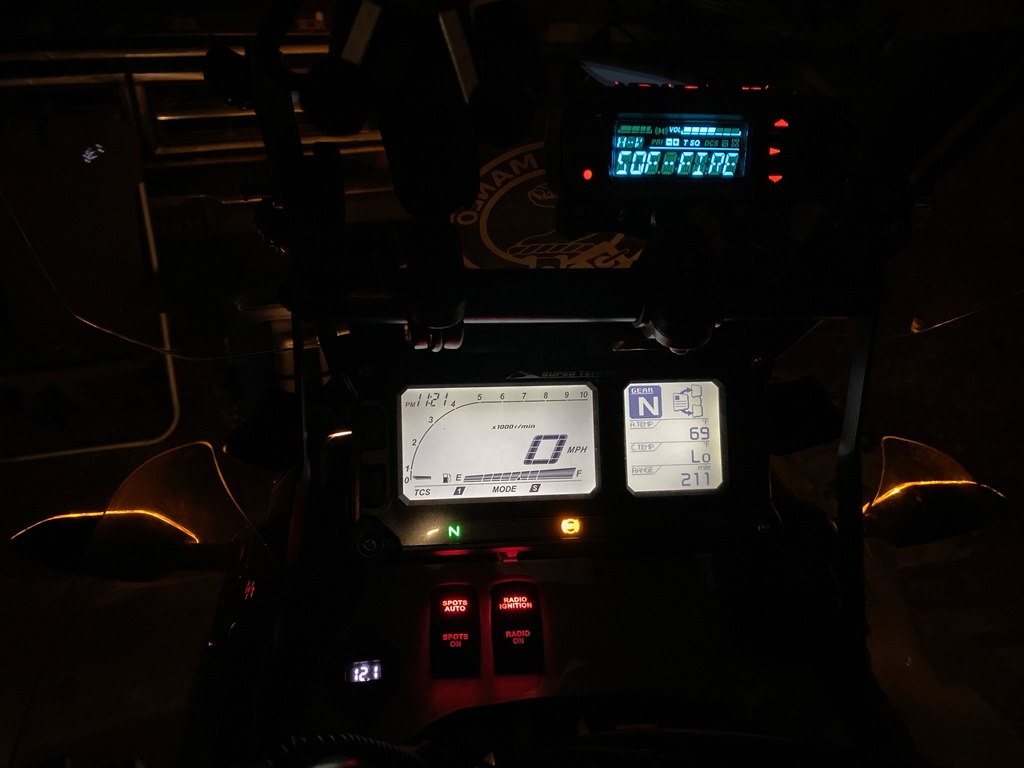
There aren't really a lot of good options for full power radios for motorcycles. Yaesu made the FTM-10R. The radio had a non-waterproof control unit and a waterproof remote-mounted head. It fits the bill perfectly. The only issue is it was discontinued several years ago and is rather hard to find. I paid dearly for a good example on eBay and started to work in getting it going.
Please note that the radio mounting and antenna currently shown in this thread are temporary solutions. My ultimate plan will mount the radio in a less obtrusive way and have an antenna mount that does not interfere with luggage.
For wiring I spring-boarded off of my existing wiring upgrades. Please see this thread for full details.
After getting the radio I started planning my installation. My goal is to have the head mounted on the tube under the windshield (commonly use for GPS units) and the control unit mounted in a water-resistant box. For normal use I will join it to my pre-exsiting Sena headset using their SR-10 two-way radio adaptor.
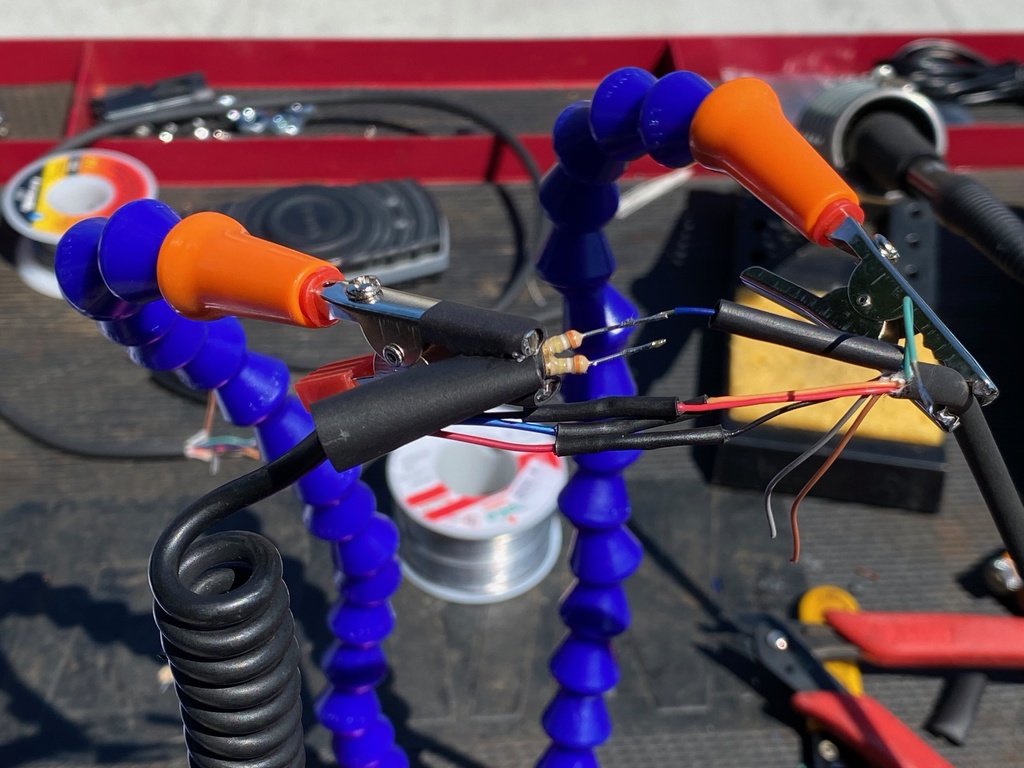
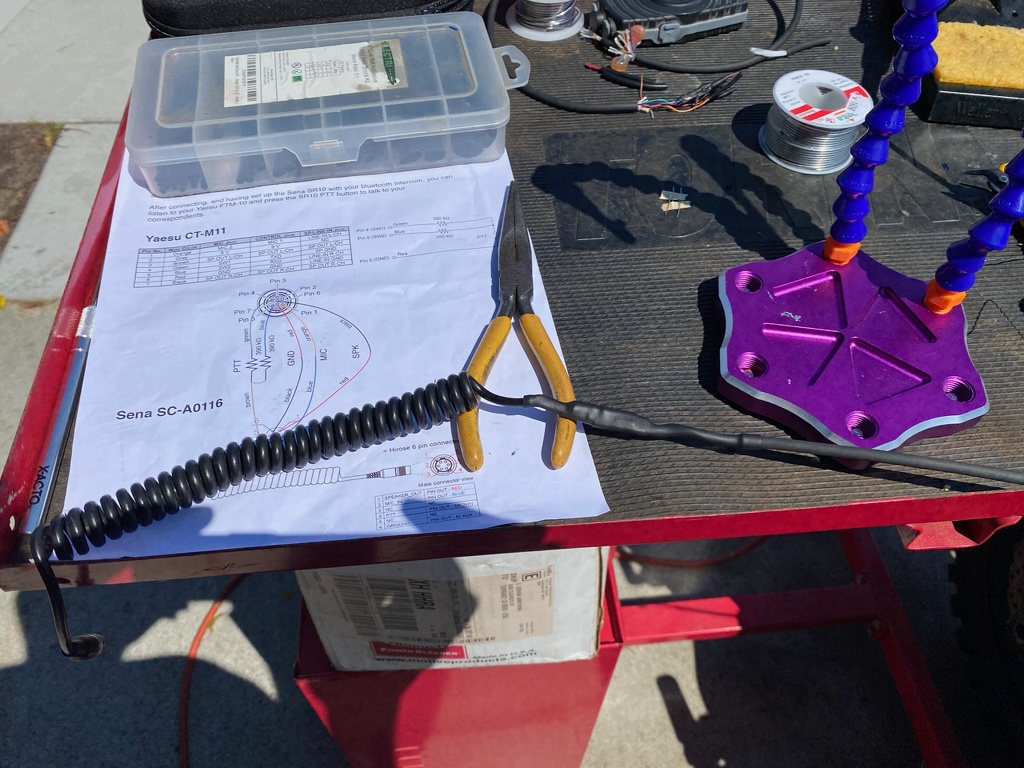
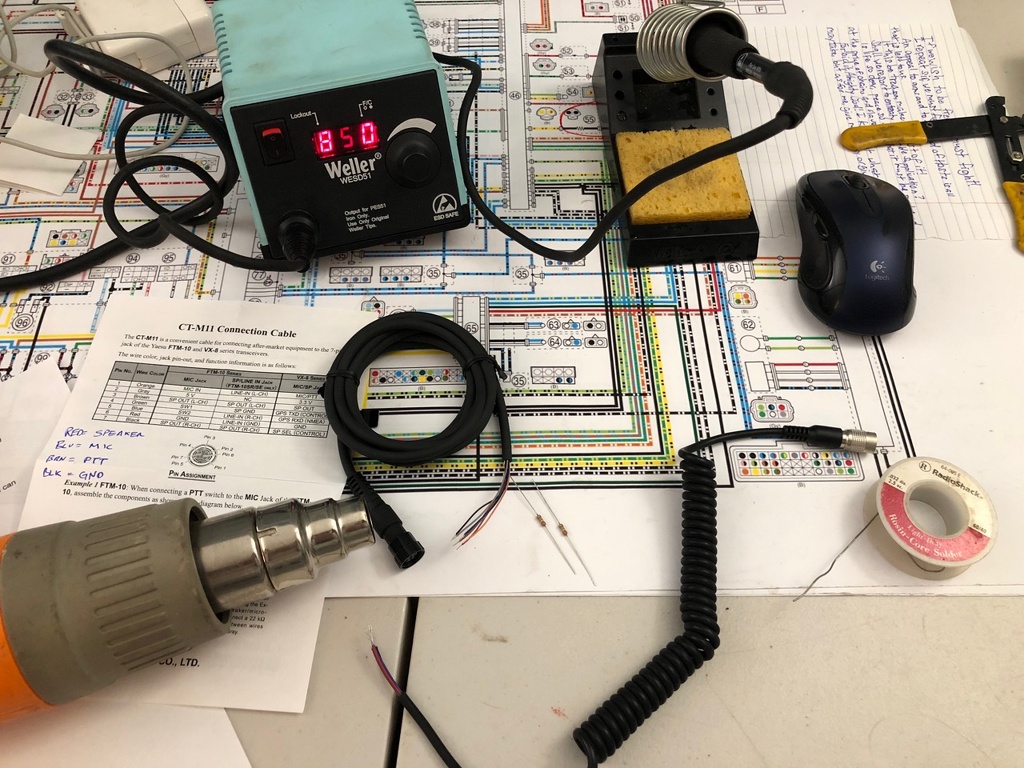
To do this the first step is to make the loom that joins the Sena wiring to the Yaesu. Luckily Yaesu still carriers the wiring to do this, the CT-M11 cable. I picked up a bare wire Sena (Sena SC-A0116) loom and proceeded to make it work. I left an unnecessary amount of wire on this connector as I may ultimately relocate components, when I have my permanent solution I will shorten the loom to its minimal necessary length.
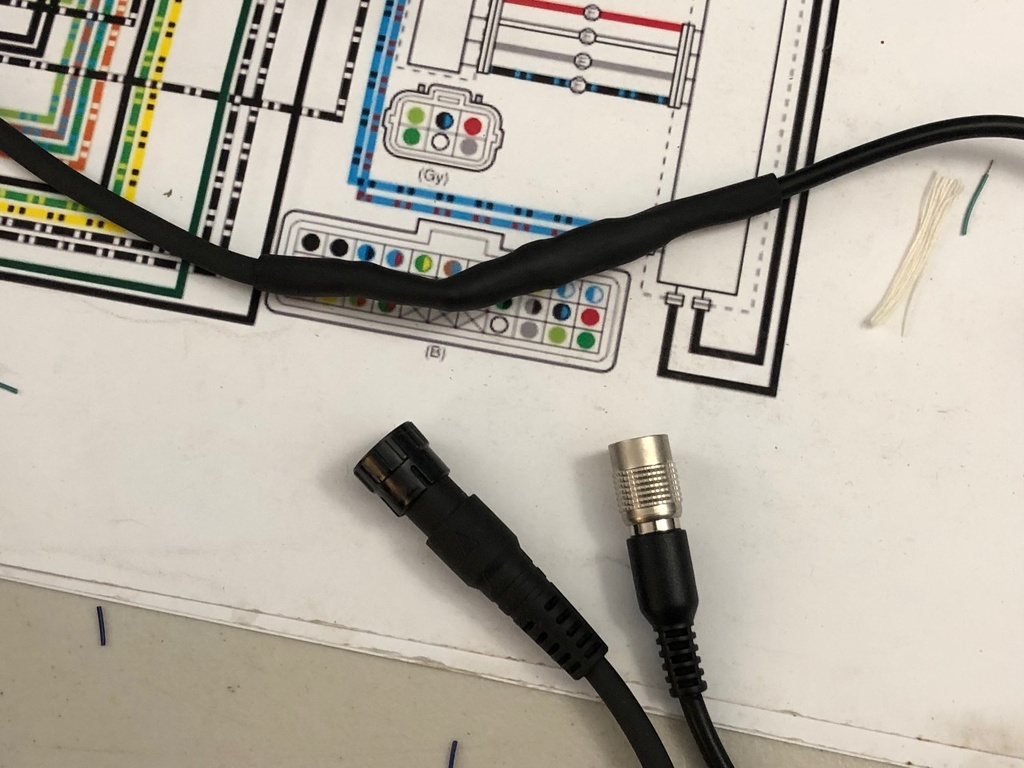
Yaesu connector on the left, Sena on the right.
Next up is power. I have the radio set up on a switched circuit. The switch is a double-throw switch which gives me one position with constant power and the other tied to ignition power (more details on how I achieved ignition power in the thread referenced above).
Since the radio is a high-load item the input power pin #30 for the relay comes directly from the battery with a 20 amp fuse before entering the relay. Both relay and fuse are in a small fuse/relay box noted in the above thread. From there pin #87 leads to the radio itself.
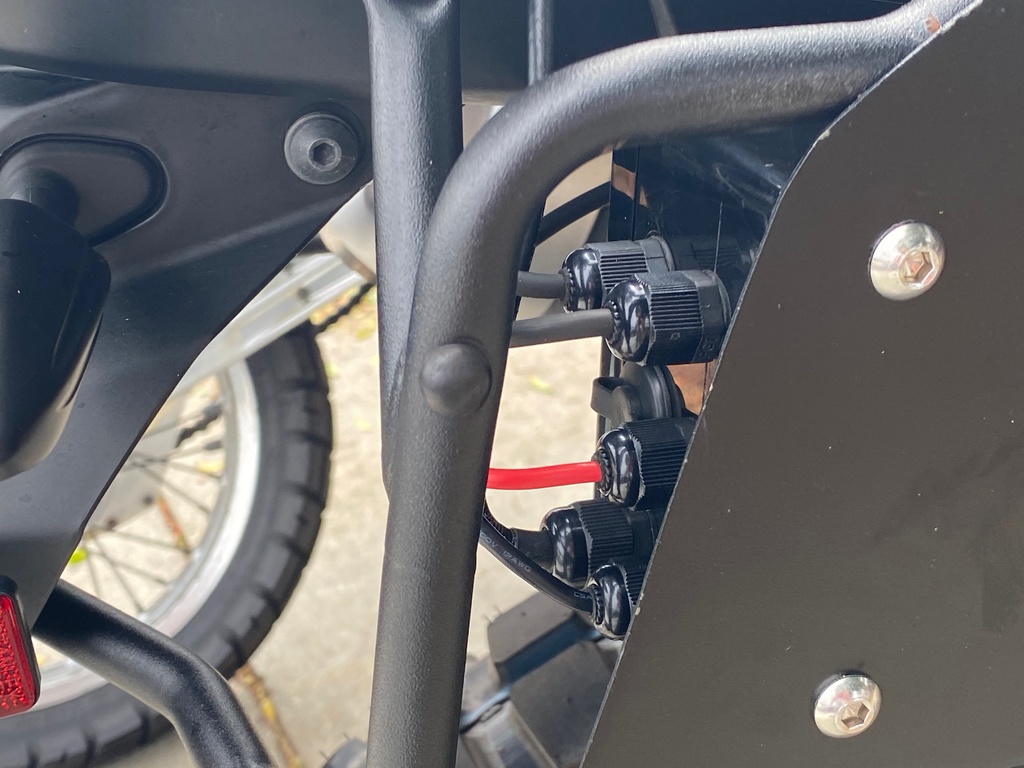
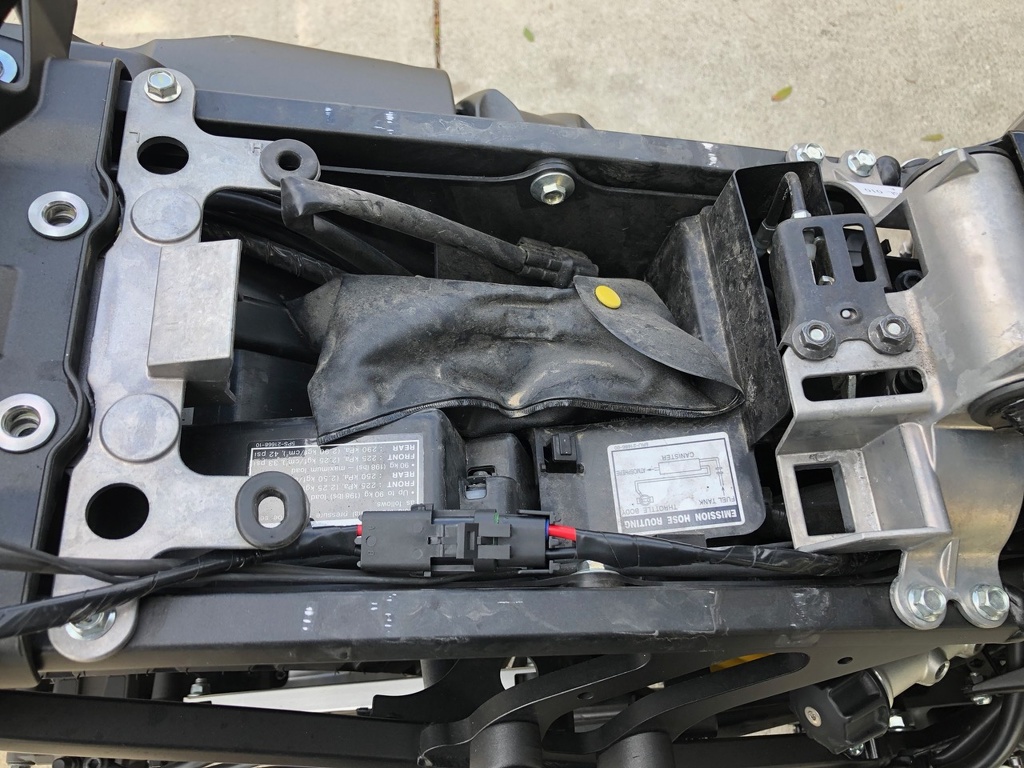
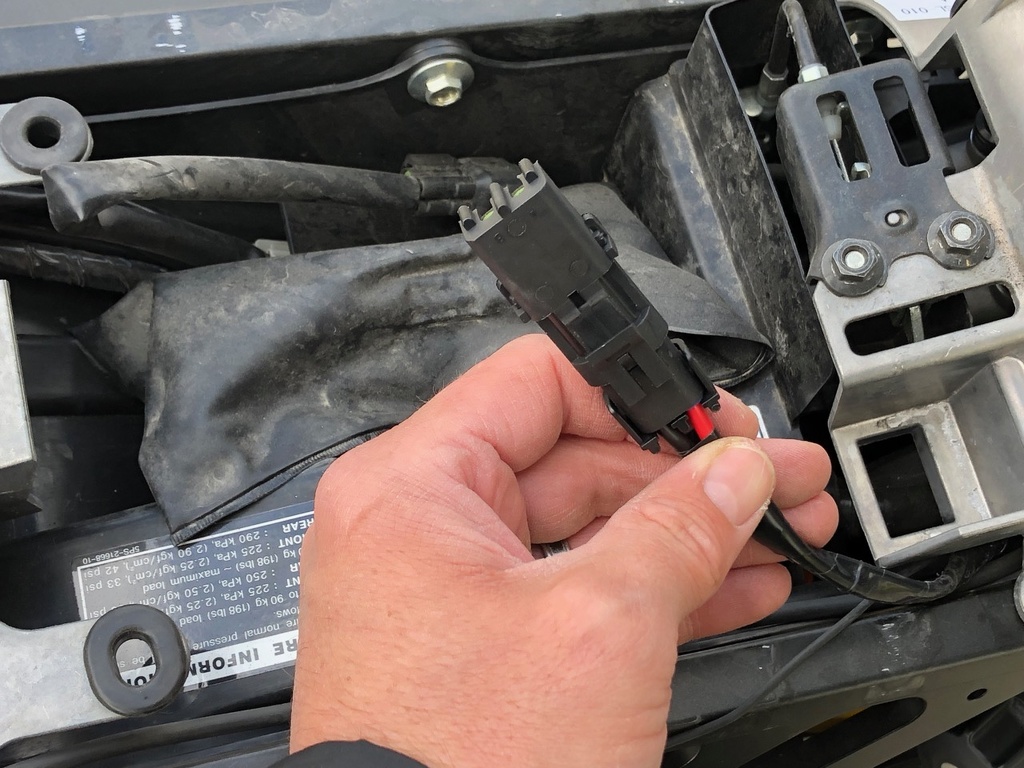
Since I won't be running the radio all the time I staged a connector under the seat in a water-resistant Metri-pack connector carrying my ground and positive wires. When I'm not running the radio I put a blank capped connector over this to keep any risk of shorts at bay.
As an added benefit to this I also wired in an SAE connector cable as an alternate load on this wire (plug it in instead of a radio). These are normally used for battery maintenance chargers but I found a pretty nifty USB Outlet with voltmeter on Amazon that I could use to have more charging capability when camping off the bike as my other USB charge outlets only operate when the ignition is on.
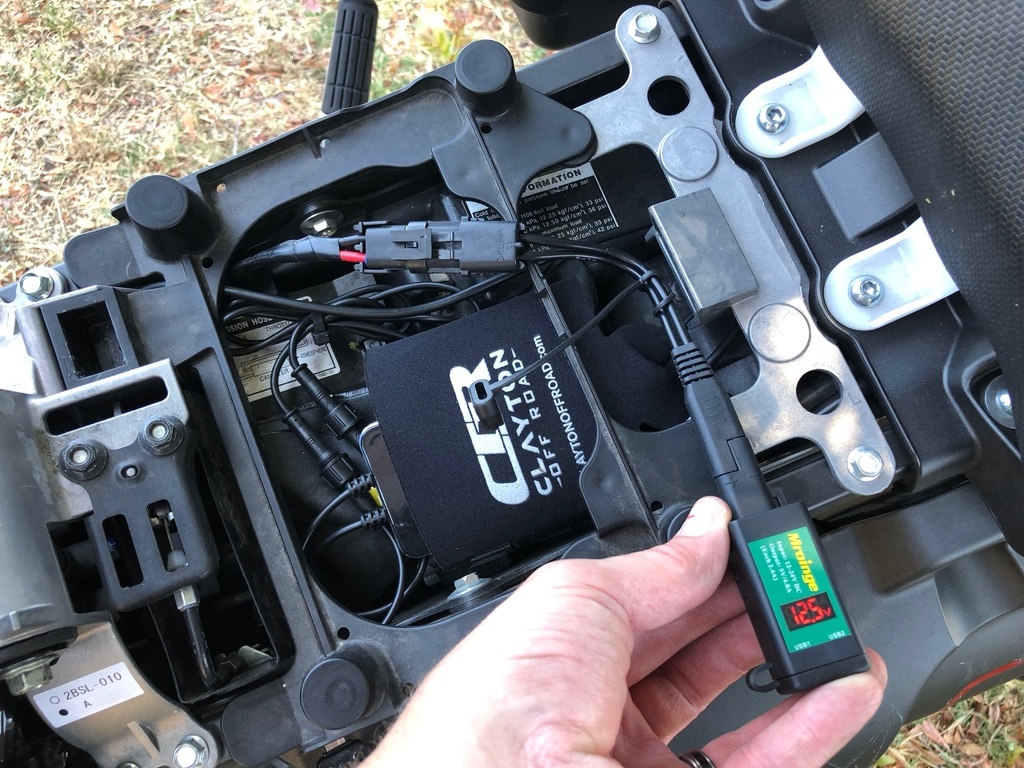
This was quite helpful when I took the bike for a week camping in the Sequoia National Forest earlier this year.
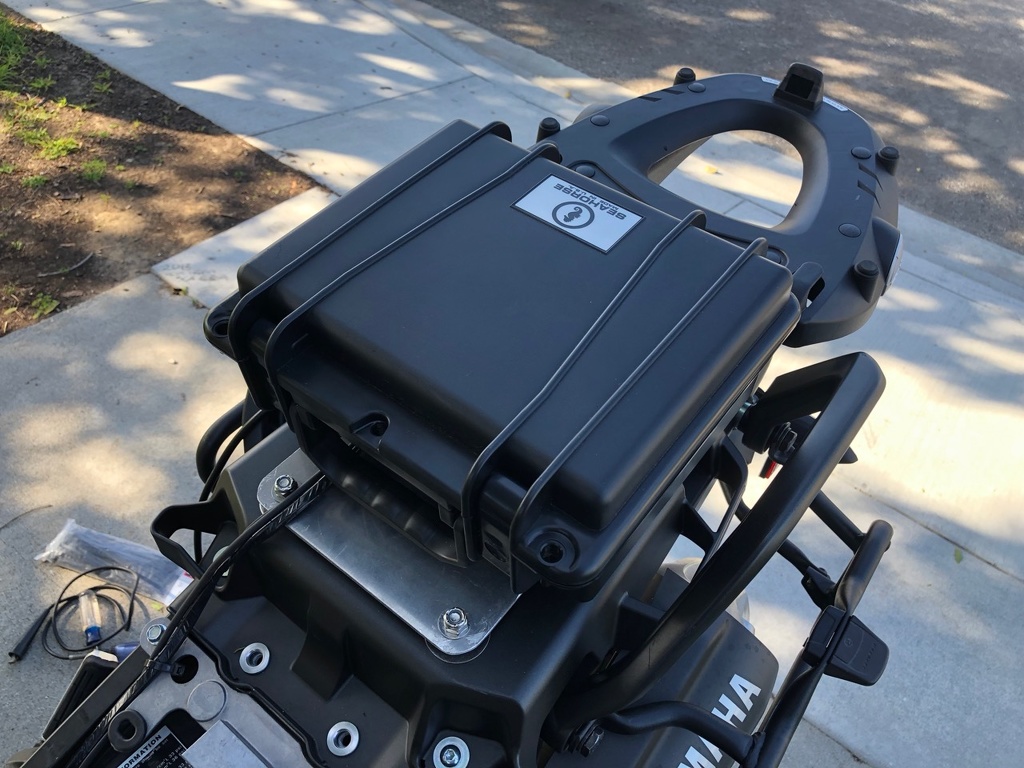
So back to the radio my ultimate plan is to hard mount it behind the right side pannier rack but I didn't have time to do my research so picked up a Seahorse box (knock off Pelican) from Amazon to house the goods. This box is then mounted to an 1/8" aluminum plate that replaces my rear seat.
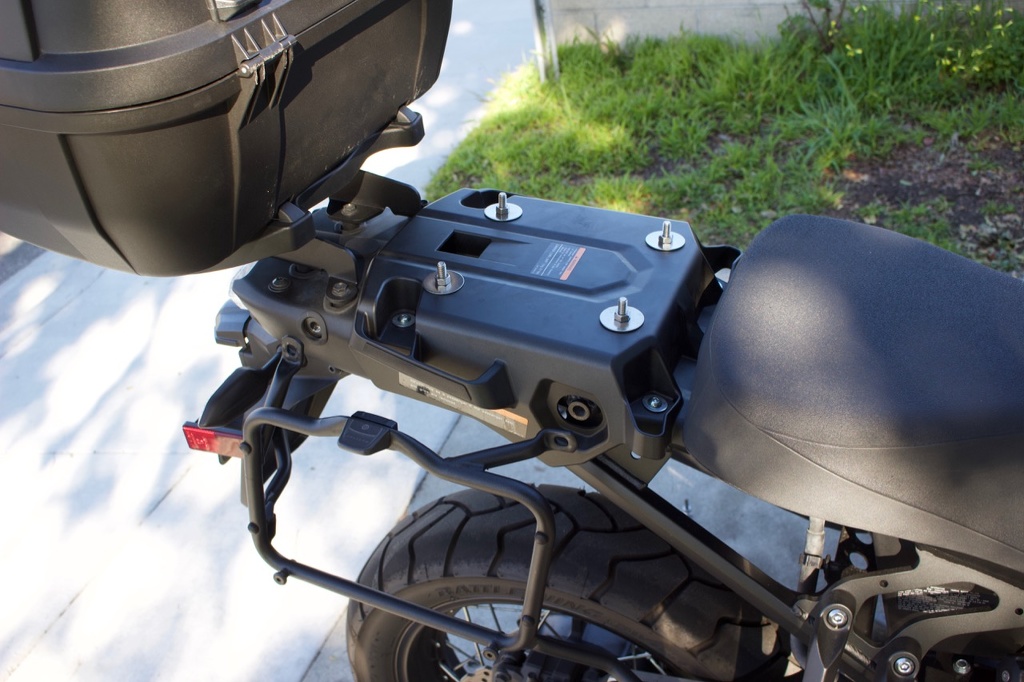
First I removed the rear seat and the pan underneath. Then I removed the four rubber bumpers that the seat rests on and ran some bolts with fender washers through them. Notching the fender washers where needed.


That done I put another set of fender washers on top and ran a nut down to hold the bolts in place. This also serves to act as standoffs to keep the plate from rubbing against the panel.
Next it was as simple as attaching the plate to the bolts.
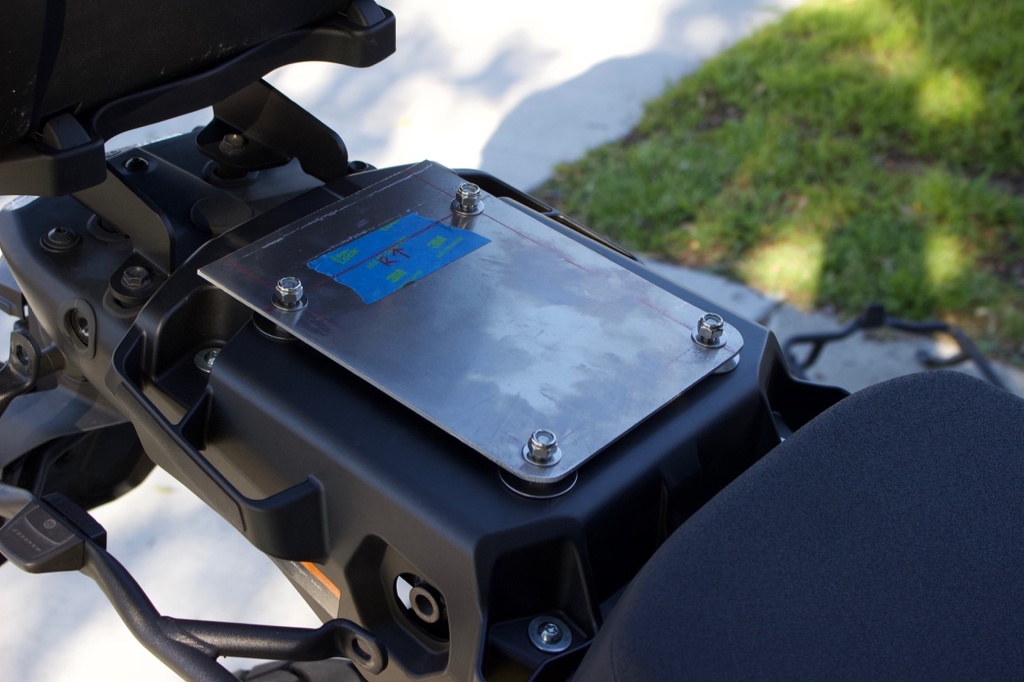
Last I drilled a mounting pattern in both the box and aluminum plate and bolted them together with 1/2" standoffs in between them to give me room to route the cables.
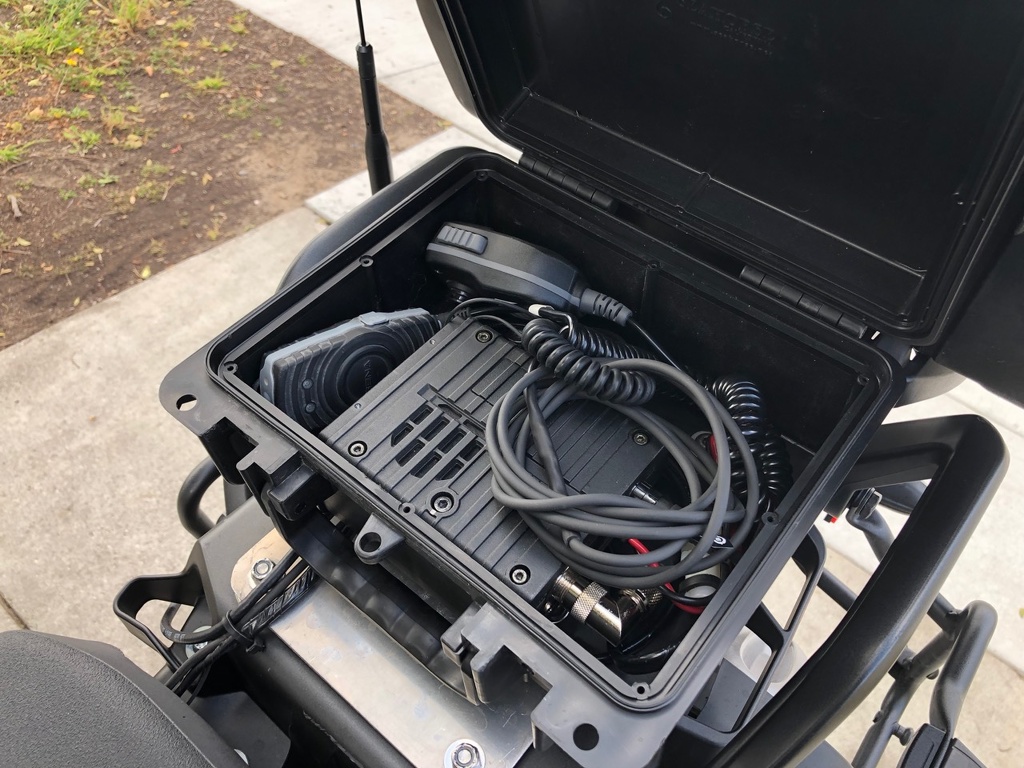
With a few more holes in the box I was able to mount the radio bracket to the box and the radio to the bracket. This left enough room for my extra cable (for future relocation), the hand-held microphone for when I'm not wearing my helmet, and the Sena SR-10 two-way radio adapter with a little room leftover. I added a 3/4" hole so that the antenna, power, and head unit cables can pass through.
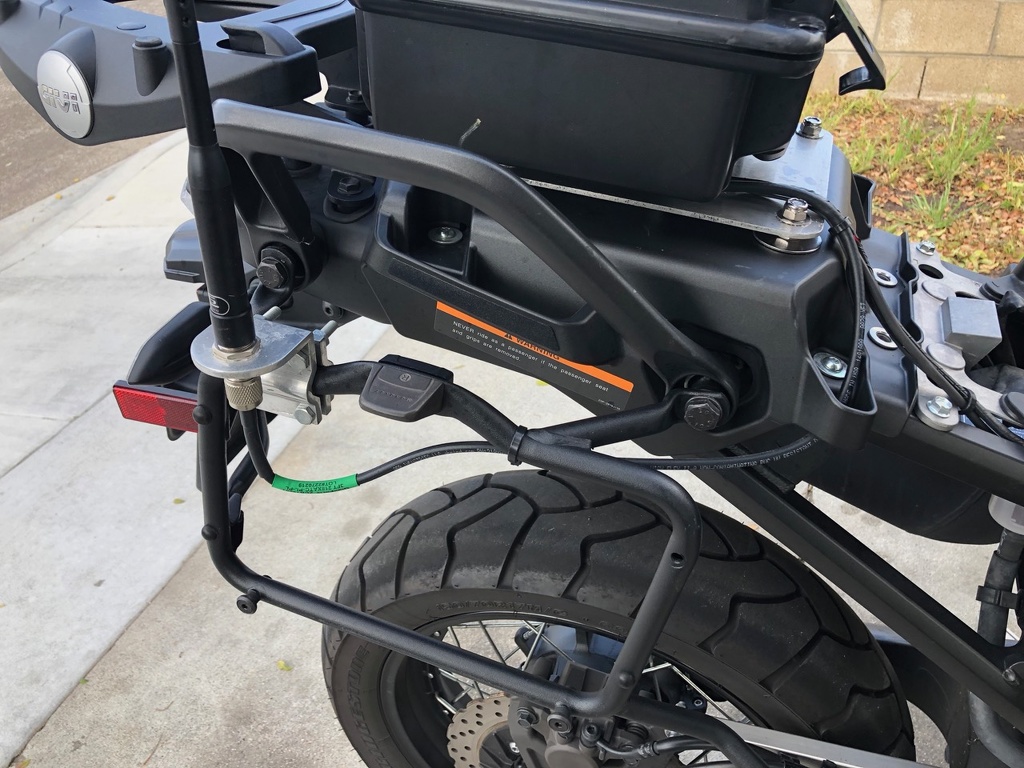
The next point is the antenna. If you know much about radios you've probably heard of ground plane. To cut to the chase there are two parts of an antenna, your radiating tip and your ground plane. You need both to get performance. Most mobile antennas use the sheetmetal of the vehicles body as a ground plane but this won't work for motorcycles. For this purpose you need a special No Ground Plane antenna (used in situations like this and also on stuff like RVs that have fiberglass bodies). I chose a Comet SBB-5 antenna as it was not obnoxiously long and is a reputable brand.
Ultimately I will make a proper mount for this antenna. For now I use a truck mirror bracket attached to my RH pannier rack. I can't use my side box with the antenna installed but I don't use them off-road anyway so no big loss for now.
I used a short RG-58 cable to attach them and adjusted SWR (no pictured here).
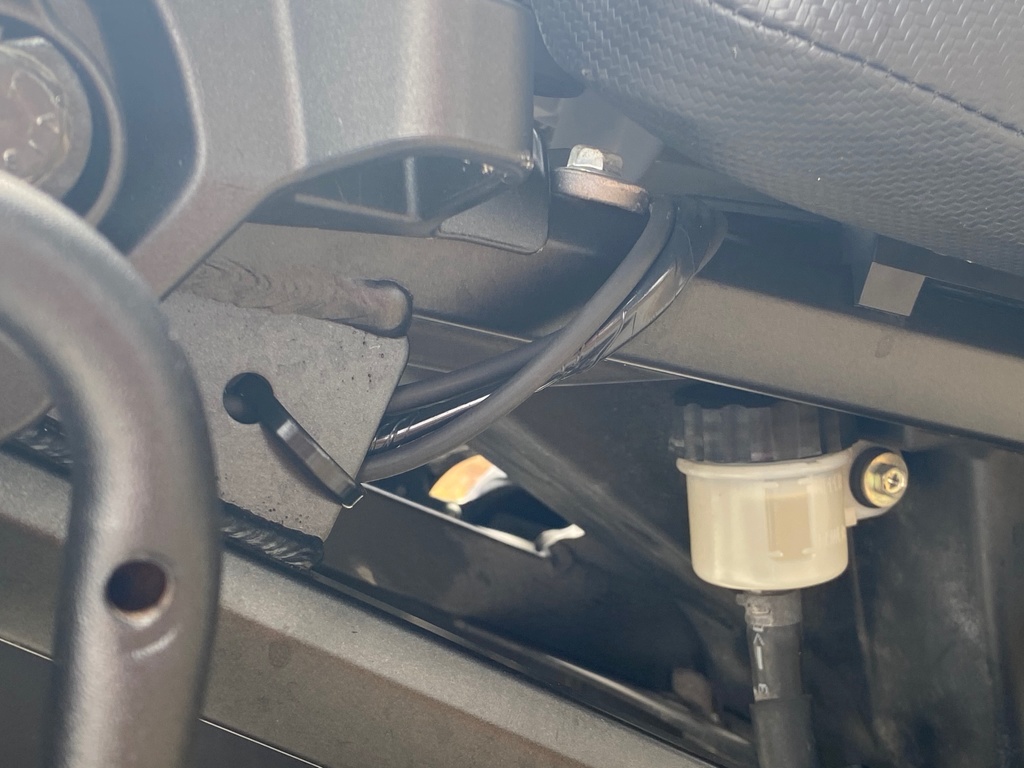
Last I just had to route the cable for my head unit and mount it. The cable has RJ-45 ends (think network cables) to attach to the radio box and head unit making for simple connections. I ran this cable along the frame and under the fuel tank to poke up through my front cowling and lead to my head unit.
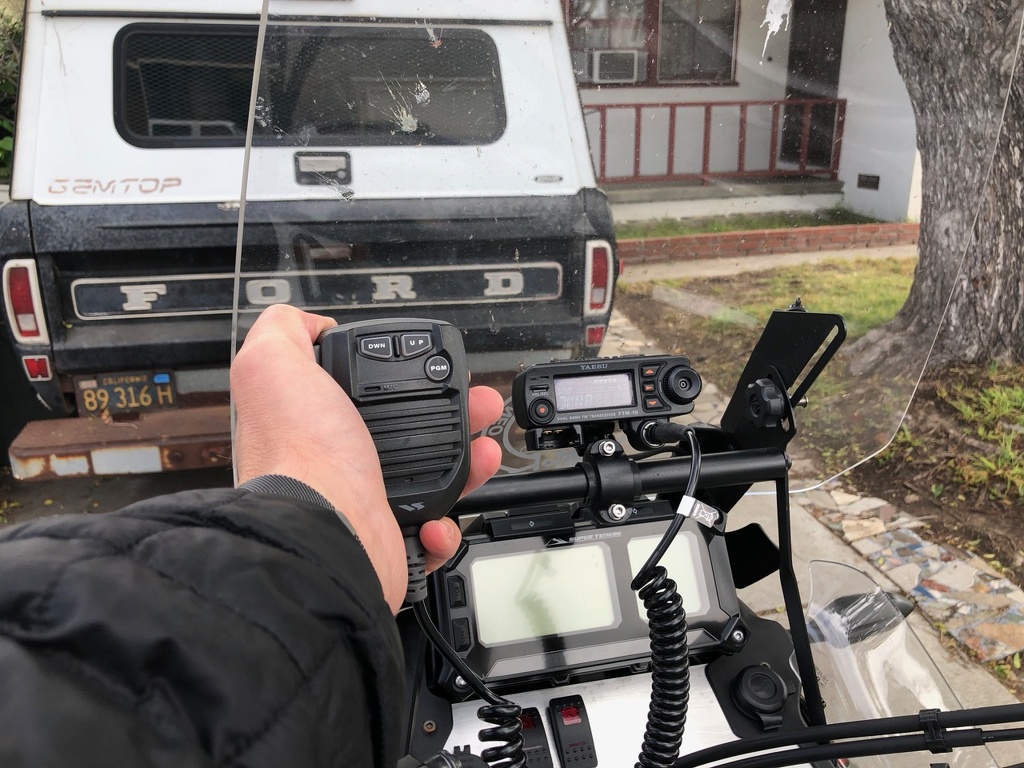
Radio installed with the handheld mic hooked up - You can hook it up here on the front of the radio (with the proper optional connector, Yaesu PN MEK-M10) or to the radio body.
I use the handheld mic only if the bike is parked, clearly. Day-to-day is currently through my Sena system although I ultimately would like to look into a hard-wired Rugged Radios setup. I used the radio for the Noobs Rally and it worked fantastically. The only thing I don't like about the radio is it lacks the capability to be programmed from a computer. I'd love it if Yaesu would re-vamp this model but I'm afraid there just aren't that many interested parts at the price point it would sell it (probably $350ish).
Anyway one of the goals with the big bike was to get a big, full sized radio on it. We have a lot more electrical capacity on these beasts to handle the radio and while a full, sustained 20A draw may ultimately overwhelm the charging system (causing the battery to drain) I transmit briefly. When you're receiving the draw is minimal so you can monitor all day long.
There aren't really a lot of good options for full power radios for motorcycles. Yaesu made the FTM-10R. The radio had a non-waterproof control unit and a waterproof remote-mounted head. It fits the bill perfectly. The only issue is it was discontinued several years ago and is rather hard to find. I paid dearly for a good example on eBay and started to work in getting it going.
Please note that the radio mounting and antenna currently shown in this thread are temporary solutions. My ultimate plan will mount the radio in a less obtrusive way and have an antenna mount that does not interfere with luggage.
For wiring I spring-boarded off of my existing wiring upgrades. Please see this thread for full details.
After getting the radio I started planning my installation. My goal is to have the head mounted on the tube under the windshield (commonly use for GPS units) and the control unit mounted in a water-resistant box. For normal use I will join it to my pre-exsiting Sena headset using their SR-10 two-way radio adaptor.
To do this the first step is to make the loom that joins the Sena wiring to the Yaesu. Luckily Yaesu still carriers the wiring to do this, the CT-M11 cable. I picked up a bare wire Sena (Sena SC-A0116) loom and proceeded to make it work. I left an unnecessary amount of wire on this connector as I may ultimately relocate components, when I have my permanent solution I will shorten the loom to its minimal necessary length.
Yaesu connector on the left, Sena on the right.
Next up is power. I have the radio set up on a switched circuit. The switch is a double-throw switch which gives me one position with constant power and the other tied to ignition power (more details on how I achieved ignition power in the thread referenced above).
Since the radio is a high-load item the input power pin #30 for the relay comes directly from the battery with a 20 amp fuse before entering the relay. Both relay and fuse are in a small fuse/relay box noted in the above thread. From there pin #87 leads to the radio itself.
Since I won't be running the radio all the time I staged a connector under the seat in a water-resistant Metri-pack connector carrying my ground and positive wires. When I'm not running the radio I put a blank capped connector over this to keep any risk of shorts at bay.
As an added benefit to this I also wired in an SAE connector cable as an alternate load on this wire (plug it in instead of a radio). These are normally used for battery maintenance chargers but I found a pretty nifty USB Outlet with voltmeter on Amazon that I could use to have more charging capability when camping off the bike as my other USB charge outlets only operate when the ignition is on.
This was quite helpful when I took the bike for a week camping in the Sequoia National Forest earlier this year.
So back to the radio my ultimate plan is to hard mount it behind the right side pannier rack but I didn't have time to do my research so picked up a Seahorse box (knock off Pelican) from Amazon to house the goods. This box is then mounted to an 1/8" aluminum plate that replaces my rear seat.
First I removed the rear seat and the pan underneath. Then I removed the four rubber bumpers that the seat rests on and ran some bolts with fender washers through them. Notching the fender washers where needed.
That done I put another set of fender washers on top and ran a nut down to hold the bolts in place. This also serves to act as standoffs to keep the plate from rubbing against the panel.
Next it was as simple as attaching the plate to the bolts.
Last I drilled a mounting pattern in both the box and aluminum plate and bolted them together with 1/2" standoffs in between them to give me room to route the cables.
With a few more holes in the box I was able to mount the radio bracket to the box and the radio to the bracket. This left enough room for my extra cable (for future relocation), the hand-held microphone for when I'm not wearing my helmet, and the Sena SR-10 two-way radio adapter with a little room leftover. I added a 3/4" hole so that the antenna, power, and head unit cables can pass through.
The next point is the antenna. If you know much about radios you've probably heard of ground plane. To cut to the chase there are two parts of an antenna, your radiating tip and your ground plane. You need both to get performance. Most mobile antennas use the sheetmetal of the vehicles body as a ground plane but this won't work for motorcycles. For this purpose you need a special No Ground Plane antenna (used in situations like this and also on stuff like RVs that have fiberglass bodies). I chose a Comet SBB-5 antenna as it was not obnoxiously long and is a reputable brand.
Ultimately I will make a proper mount for this antenna. For now I use a truck mirror bracket attached to my RH pannier rack. I can't use my side box with the antenna installed but I don't use them off-road anyway so no big loss for now.
I used a short RG-58 cable to attach them and adjusted SWR (no pictured here).
Last I just had to route the cable for my head unit and mount it. The cable has RJ-45 ends (think network cables) to attach to the radio box and head unit making for simple connections. I ran this cable along the frame and under the fuel tank to poke up through my front cowling and lead to my head unit.
Radio installed with the handheld mic hooked up - You can hook it up here on the front of the radio (with the proper optional connector, Yaesu PN MEK-M10) or to the radio body.
I use the handheld mic only if the bike is parked, clearly. Day-to-day is currently through my Sena system although I ultimately would like to look into a hard-wired Rugged Radios setup. I used the radio for the Noobs Rally and it worked fantastically. The only thing I don't like about the radio is it lacks the capability to be programmed from a computer. I'd love it if Yaesu would re-vamp this model but I'm afraid there just aren't that many interested parts at the price point it would sell it (probably $350ish).


")