CCT replacement manual or auto (yamaha)

Boris

Well-Known Member
Joined
Dec 21, 2013
Messages
2,092
Location
midlands. UK
hi boris,

can you see the numbers that easily then, cct is on the right side isn,t it but not exactly shore tho

rob
Yes, with a torch the numbers are very easy to read. Right hand side, between the tank and the frame rail, almost next to the battery side panel, just shine a torch and it's right there. Might have to push the main loom a few mm to the side, but it's really a 15 second job.
 

bimota

Moderator
Staff member
Global Moderator
Joined
Dec 10, 2017
Messages
6,685
Location
bridgend, Wales, UK

Boris

Well-Known Member
Joined
Dec 21, 2013
Messages
2,092
Location
midlands. UK
No need to remove the panel. Here's a pic of the old CCT with 23p at the bottom. New CCT has 2BS in much bigger letters, right across that circle.

image.jpeg
 

beastie

Member
Joined
Feb 22, 2019
Messages
38
Definitely get a manual tensioner. Had mine in for 3 years and haven't had to adjust it yet. It takes about 5 mins to do,if that,very easy to install and don't see it failing in the years to come. Very satisfying when it doesn't clatter for a few seconds on start up.
 

virtualghost4

New Member
Joined
Aug 27, 2020
Messages
8
Location
Chile
Definitely get a manual tensioner. Had mine in for 3 years and haven't had to adjust it yet. It takes about 5 mins to do,if that,very easy to install and don't see it failing in the years to come. Very satisfying when it doesn't clatter for a few seconds on start up.
Can i install a new manual one just removing the old one and install the replacement back or is more complicated?
 

beastie

Member
Joined
Feb 22, 2019
Messages
38
When I did mine,from memory,I placed a spacer(a socket of the correct o.d.) behind the slider to keep tension on the cam chain before backing the old tensioner out.
Removed the oem tensioner,bolted the manual one in place,wound the adjuster in by hand to the point the spacer fell out,backed out the adjuster a quarter turn or so,
lightly tightened down the lock nut,double and triple checked I hadn't left anything in there,then bolted the cover back on.
The actual replacement of the MCT took 5 mins ,maybe less.
The removal/replacement of the cover on the other hand,that was the longest part of the job.
30mins tops,maybe a couple of hours if it's beer o'clock.
And believe me,I am no mechanic,just thought I'd give it a crack,on the day.
 

virtualghost4

New Member
Joined
Aug 27, 2020
Messages
8
Location
Chile
When I did mine,from memory,I placed a spacer(a socket of the correct o.d.) behind the slider to keep tension on the cam chain before backing the old tensioner out.
Removed the oem tensioner,bolted the manual one in place,wound the adjuster in by hand to the point the spacer fell out,backed out the adjuster a quarter turn or so,
lightly tightened down the lock nut,double and triple checked I hadn't left anything in there,then bolted the cover back on.
The actual replacement of the MCT took 5 mins ,maybe less.
The removal/replacement of the cover on the other hand,that was the longest part of the job.
30mins tops,maybe a couple of hours if it's beer o'clock.
And believe me,I am no mechanic,just thought I'd give it a crack,on the day.
i'm wondering if you remove the clutch cover and hold the slider from there? no risk about loose the timming?
i'm not in my house due covid and my tools are really limited.
for the other side is easier to me get the automatic cct than the manual cct, if you worked taking off the clutch cover. do you think the procedure to change the cct is the same?
please clarify if you worked from side or above. i really appreaciate it!
thank you very much, dude!
 

Tenman

Well-Known Member
Joined
Dec 7, 2013
Messages
2,110
Location
Natchez Ms USA
I put the updated auto cct in my gen1. It has 45k miles on it. So far. No problems. I haven't heard of failure yet. Knock on wood.
 

beastie

Member
Joined
Feb 22, 2019
Messages
38
Sorry,I should have been clearer. Bike on side stand,clutch cover removed. There should be very little to no oil spillage.
It would be a little foolhardy to remove the old tensioner without using something to pre tension the cam chain. By using a socket with the correct outer diameter to provide tension on the cam chain, it holds itself in place when you remove the old CCT. The act of applying tension via the MCCT allows the socket to fall away when the correct tension is reached.
I think I had a 5 or 6mm Allen wrench for clutch cover,a 10,12 and 14mm spanner and whatever sized socket it was as the CC tension spacer.
Just be cautious with the clutch cover gasket and the locator dowels.
I still haven't had to adjust mine,and I've never had start up clatter again.
There may have been a 14 or 17mm spanner involved, as well.
 

beastie

Member
Joined
Feb 22, 2019
Messages
38
There have been issues with some later model OEM CCT's.
Haven't had any with the several MCCT'S I have fitted to my bikes over the years.
I have no affiliation to any parts manufacturers,this is just my experience over the last 15 years and several bikes.
Hope it all works out.
 

03A3KRH

Active Member
Joined
Jun 28, 2014
Messages
98
Location
Black Hills
My 2013 was rattling more than I realized at 26,000 miles. Installed a Graves manual adjuster. I was surprised at how quiet it was the first time I started it after install. I would highly recommend doing it sooner rather than later.
 

cyclemike4

Well-Known Member
Joined
Sep 18, 2016
Messages
827
Location
ky
I have a 14 timing chain tensioner in my 12 bike. It has been fine for im guessing 50,000 miles or more. This is the only bike i have ever owned that i had to replace the timing chain tensioner. You wonder how things like that get through the development process. yamaha has been building bikes for over 50 years. It isn't like they don't know how to make it right. Guess it was a cost cutter or it is possible that was a outside vendor the provided that tensioner and it was made cheaper and Yamaha wasn't aware of it. Who knows? After the dirt bikes and four wheelers when to four stroke motors the kids would destroy a timing chain in 6 months but i never had to change one of those tensioners. they always held things tight till the chain was worn too much.
 

virtualghost4

New Member
Joined
Aug 27, 2020
Messages
8
Location
Chile
Sorry,I should have been clearer. Bike on side stand,clutch cover removed. There should be very little to no oil spillage.
It would be a little foolhardy to remove the old tensioner without using something to pre tension the cam chain. By using a socket with the correct outer diameter to provide tension on the cam chain, it holds itself in place when you remove the old CCT. The act of applying tension via the MCCT allows the socket to fall away when the correct tension is reached.
I think I had a 5 or 6mm Allen wrench for clutch cover,a 10,12 and 14mm spanner and whatever sized socket it was as the CC tension spacer.
Just be cautious with the clutch cover gasket and the locator dowels.
I still haven't had to adjust mine,and I've never had start up clatter again.
There may have been a 14 or 17mm spanner involved, as well.
Thank you very much for this, my friend..
i will try the next week :)
 

DamonS

Active Member
Joined
Apr 27, 2021
Messages
89
Location
Ontario, Canada
Just did mine this weekend thanks to 3 days of rainy weather. its a very simple process, just take your time.

I had mine on center stand, but up on a bike platform lift.. I chose to lift my tank, just to make it easier to access, I also just slid the wiring harness over to the throttle body and did a loose zip tie to keep it out of the way.
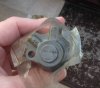
Take off the clutch cover, take a wrench and spin the motor over so the T is horizontal to the right side (right side with you facing that side of the bike, there is a flat mark on the case that you line it up with, its not obvious at first glance, but its there). then took a 1 inch bolt and nut and used it as a wedge to keep the tensioner under full tension. because i'm anal, i also put a zip tie around the whole thing just as insurance (wasn't needed but i don't take chances).
remove the 2 bolts holding in the chain tensioner, and slide in the replacement, bring it down to tight and go 1/2 turn past and it should drop your nut/bolt wedge rig out into your hand. then back out the tensioner a 1/2 turn and you are right were the original tensioner was.
Spin the motor over 2 full turns and watch to see if the chain slacks at all (it should not with this method, but you'll feel better knowing than not knowing.

Button it all up, and start it up.. don't rev it up until it warms up a bit, let the temperature change things in the motor and then if you don't have the death rattle, you should be tight enough to ride.


A few observations.
the adjustment range is WIDE (this is more than likely why some say they never have to adjust it, still worth paying attention to, just for piece of mind, but i can see how you can get a lot of miles out of it without adjusting based on how wide the tension range is).
if you adjust it to where your automatic tensioner was, you are roughly on the loose side of middle.. the auto-cct loses tension without oil pressure and your objective is to stay on the 'slightly tighter' side of the factory one..
IF you adjust too tightly, you can hear a whirring sound.. but with the other clatters and clanks in the motor, its not obvious.. if you stay within a turn of the factory set, things are nice and quiet.

If you can change the air filter, you can swap the tensioner, just take every precaution with the chain, and DO NOT try to swap it out without keeping it from moving.
Oh, last thing I did was to put a white line with a paint marker down from the tip of the bolt, over the nut and right onto the tensioner so a quick peek can ensure its not wiggling out.

last, last thing. adjustment can be done without pulling the tank, you can access it all through the frame and the space between the frame and tank
 
Top